OLD BABY DRESSER TRANSFORMS INTO MASTER BEDROOM LINGERIE CHEST
Get Creative With That Old Unused Furniture
Can I have your old junky one?"
As a mom, you need to learn to read between the lines when you get those calls. Since I have an emotional attachment to that old thing, I told her, "Umm, I don't think so." She of course knows how to read in between my lines as well. She knew it meant, "I'm attached; I have no idea why I'd like to keep it, but you can't have it." It's a little dance we do quite often.
Fortunately, I now have reason to keep my old junk.
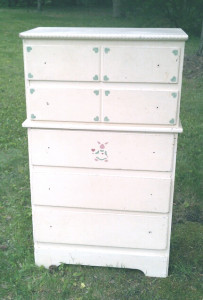
Here is the before picture of that old baby dresser that I used for my first baby until my last child left. It started out blonde wood and years ago I painted it white with little sponge painted characters for my nursery. Isn't it funny that years after you do a project that you thought turned out nice, you look at it and say to yourself,
"What was I thinkin'?"
"Yup, yup, I remember that."
- I hand sanded it with a sand paper sponge to rough up the surface a bit.
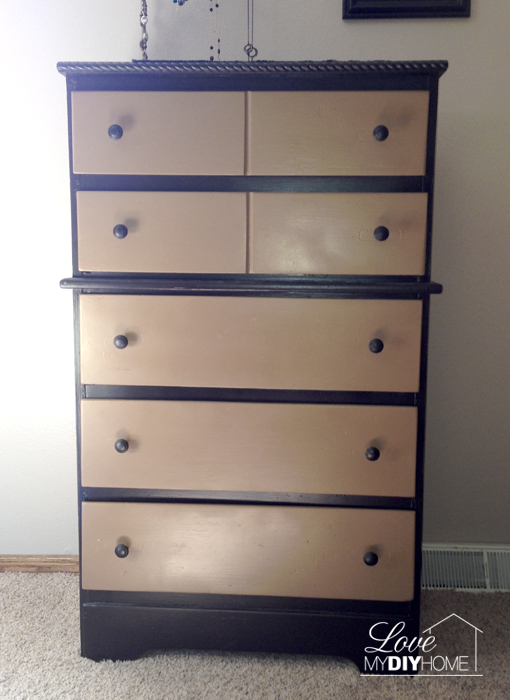
- Then I laid the individual pieces on cardboard in the front yard and painted the drawers tan and outside frame walnut brown.
- Before painting the walnut brown, I put a coat of tan on the edges so I could lightly sand off some of the walnut brown edges to give it an antiquey look.
- Since it was really hot outside, some of my spray paint dried in the air before hitting the dresser top, so I sanded it a couple of times in-between coats to give it a smoother finish.
I'm pretty happy with the look. I put it in my new master bedroom. I love it. It looks very expensive - you would never know how icky it was before (except now you do since I showed you a picture).
I bought a set of nice new knobs at Menards - which for me was quite pricey, but they were oil rubbed bronze and fit the picture in my mind of what I really wanted.
I considered hand painting the design but went for the easier approach since I don't have much talent in that area. Here's a picture of it as it laid in wait to be moved to our new home. Because of the lighting in two different rooms, they look different shades, but in fact are the same paint colors. I used satin dark walnut and tan spray paint by Rustoleum.
It's pretty amazing what you can do with a little time, courage, and can of spray paint.
I have kept my theme colors through out the house pretty much the same and just accented in other colors. I love neutrals and it makes it much easier to move deco and furniture around from room to room as needed if there is continuity of basic colors.
What are your basic and accent colors?


4 thoughts on “Old Baby Dresser into Master Bedroom Lingerie Chest & Matching Desk DIY”