#sponsored post
I’ve had a chance to give Chalk Paint® decorative paint by Annie Sloan a try and like it. Sure, sure, I’m later than most to the game. I’ve been trying out other paint brands with a plan to give Chalk Paint® a try. That changed when her company offered me their products in exchange for my review. I went to her site to find out the history of Chalk Paint®. From her website: “Annie Sloan first developed her now famous decorative paint, Chalk Paint®, in 1990. When she started working on it, she wanted to create a decorative paint that was immediate and allowed her to be direct and spontaneous.” It never gets old. Do you get tired of seeing before and afters? I never do.
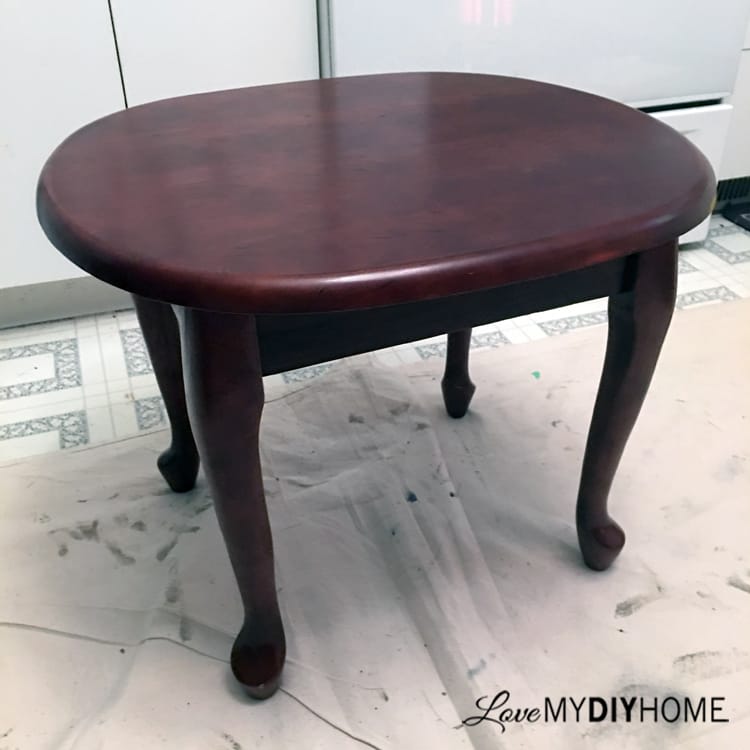
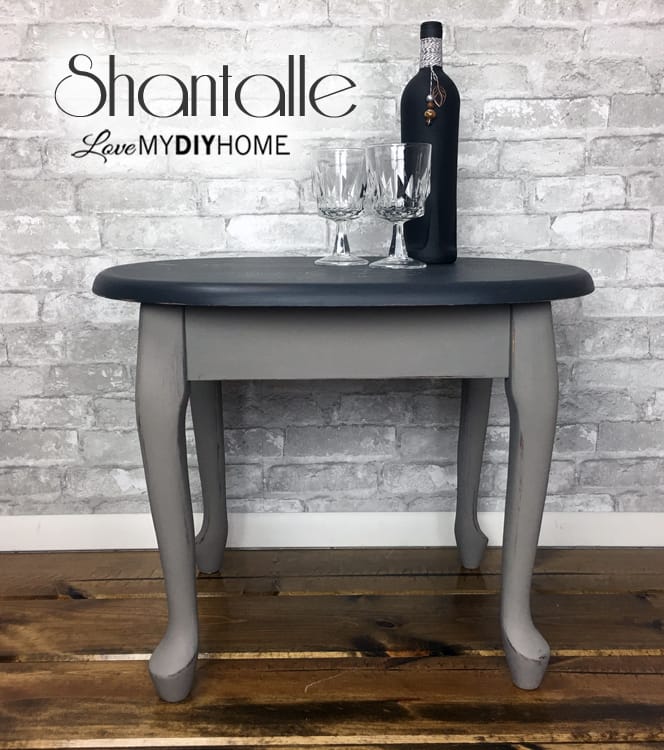
Here is her “before” – I know, I know. Her before picture is nice. BUT, she becomes WAY better after her makeover…keep scrolling and you’ll see…
I grabbed this simple table from a garage sale that normally wouldn’t garner any attention. But once I took my brush to her, she became more than average. She became a French beauty – so much so that she earned the name, “Shantalle.”
The Products…
Supplies
(Some are affliliate links for your convenience)
The Process…
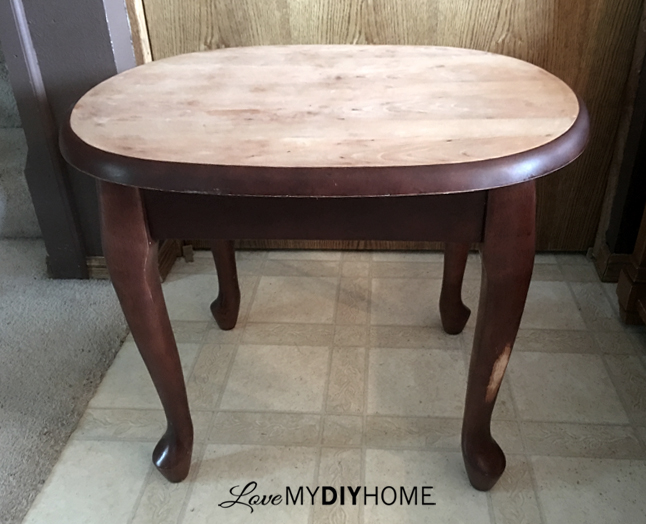
SAND and CLEAN
1. The top and legs had scratches, so sanding gave a nice smooth surface. Lightly sand the rest and give it a good cleaning with (affiliate link) Krud Kutter. PAINT
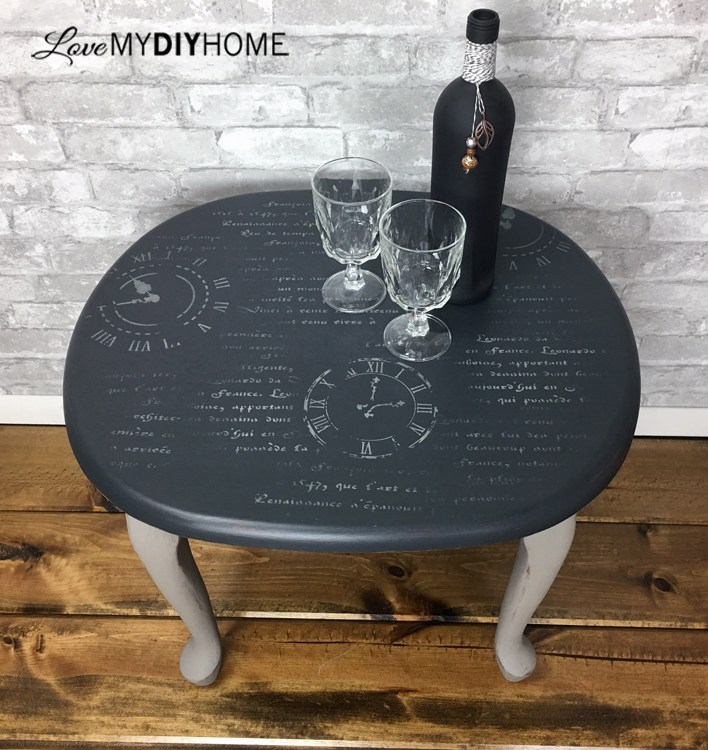
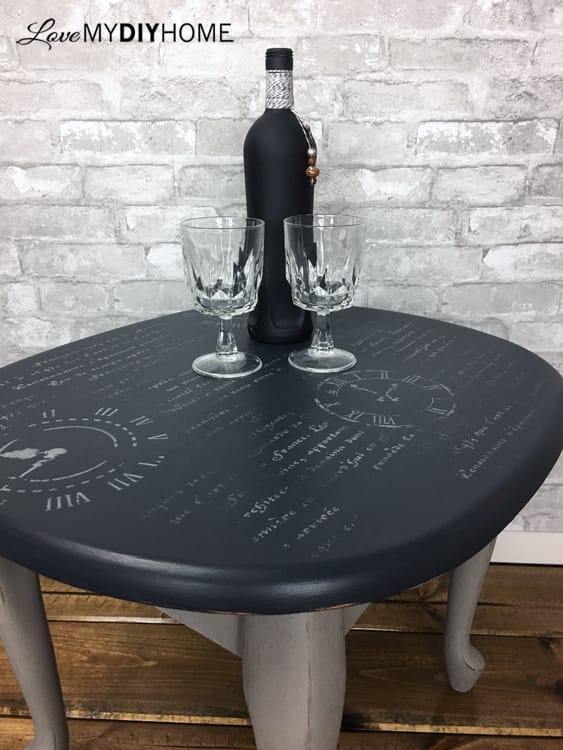
2. This was a very simple process. Using two colors, French Linen and Graphite, paint the legs and top. I used the lightest color on the legs because I planned to stencil the top the lighter color for contrast. Do two coats of the Chalk Paint®. DISTRESS
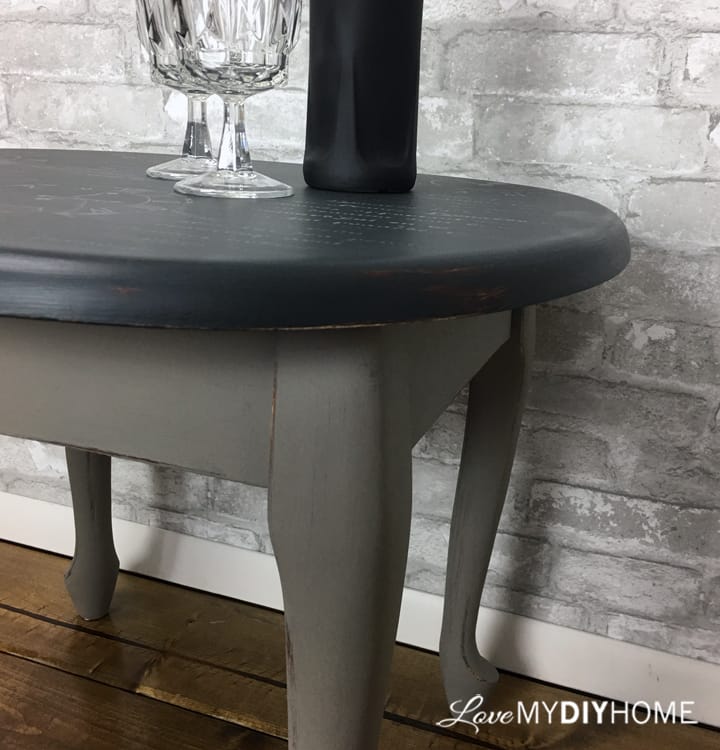
3. Using a (affiliate link) sanding sponge, do a little scuffing where you would normally see wear – edges and legs. How much you distress is strickly personal preference. If you take too much off, just repaint and start over. No big deal. 
SAND AGAIN
4. Smooth the paint after each coat to get it ready for stenciling by sanding it with a 400 grit sanding sponge. Wipe it down with a damp cloth to remove any dust. STENCIL
5. Tape down the stencil and use a stencil brush to “pounce” the paint into the stencil. Be sure to off load most of the paint onto a paper towel before stenciling so you don’t get paint bleeding below the stencil. Too much paint will smudge your design. You will have to get paint in your brush more often, but the nice clean results will be worth the extra effort.

6. Lightly run your sanding sponge over the stenciled design to distress the stenciled image just a bit to give it an aged look.
PROTECT
7. Protect with (affliliate links) Polyvine Wax Finish Varnish Dead Flat. Using a detailer’s sponge to apply the topcoat is an easy way to cover the entrie table easily and quickly. Lightly sand between coats. Two on the legs and apron, several on the top is sufficient to protect the finish. 


You can take a simple non-descript table and transform it into something noteworthy – something that anyone would feel fortunate to own. Most don’t know that it is possible to completely change a piece of furniture. My first project using Chalk Paint® was with a nightstand – “Jillian” went from dull and dirty to beautiful with a stroke of a brush.
Opportunities:
- Join our group on Facebook – we have well over 37,000 members. The group is made up of fellow flippers: visit Furniture Flipping Forum to see more projects and interract with kind, supportive furniture flippers.
- Visit our FB store, The Red Shed. Here you will see real live examples of how to stage your furniture and present your pieces for sale.
XXOO


Disclosure: This post contains affiliate links. If you buy anything after clicking on one of the affiliate links, I receive a small commission of the sale. The cost to you is the same, and I only link to items that I think would benefit my readers. Your support of this blog is greatly appreciated! The Chalk Paint®, French Linen, was graciously provided for this project. Thank you Annie Sloan, I love your paint!


Great makeover! The colors are fabulous and the stencil adds an amazing touch! Thanks for sharing your new end table
Thanks, Kathleen!
This is beautiful as usuel. Love the Colors. You're very talented.
Thank you Francoise!