
Once in a while my DH will surprise me and bring home a piece of furniture.
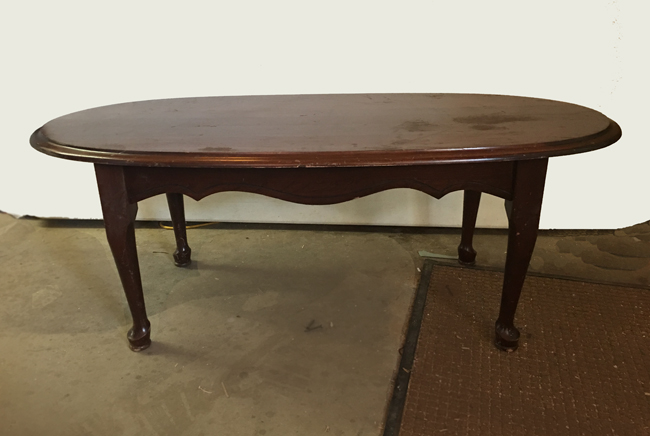
He found a little coffee table at a garage sale that had seen better days and brought it home to be revived. It always amazes me how a piece can be “worthless” in someone’s eyes, but then after a bit of redesign or refinishing it becomes a highly sought after piece of art.
OFMP generiously provided the (aff links) Lexington and Tavern Green milk paint, along with the Extra Bond for my project. They are a great company to work with, and its CEO, Ann, is a very gracious lady. Her customer service is above reproach and she is always willing to help with project advice.
LIST OF SUPPLIES (affiliate links):
Old Fashioned Milk Paint
Daddy Van’s Wax
Bertha, named for my Mother-in-law, was in rough shape and sat in our storage shed all winter.
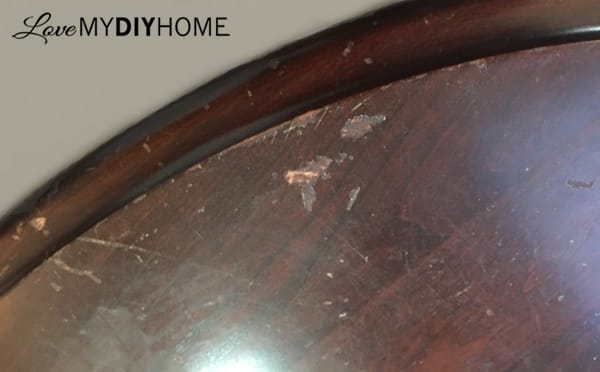
Bumps, dings and scratches made it flipping fodder. I needed to make her worthy of her name. I was a little intimidated by the very dark stain. Bleed through can a problem and sometimes it doesn’t show up until after the final topcoat.
We considered stripping and then applying shellac to seal in the stain and tanins, but I didn’t really want to add a chemical (the shellac) when using OFMP. It’s a natural paint and I wanted to keep my table “pure”. I know that sound kinda goofy – but I have an affinity for the Old Fashioned Milk Paint. It’s green (literally, in this case).
I’m not a tree hugger, but I do like natural products. Little by little we are ridding our home of chemicals. Even though I won’t be keeping this one, I still like the idea of passing on a “non-chemically refinished” piece.
DH stripped it for me.
A perk to keeping it natural by not using shellac is that (afflink) Old Fashioned Milk Paint adheres best to porous surfaces, and in this case – raw wood. She was the perfect candidate to try out (afflink) Soy Gel Stripper, so we pulled her out and used it to take off her finish. We’d never used it before and were quite impressed at how well it worked. Since I don’t like “messy” it was a good day when he offered to strip it for me. When I taught school years ago, the other teachers thought it was funny that I didn’t like to do classroom experiments and art projects that were messy.

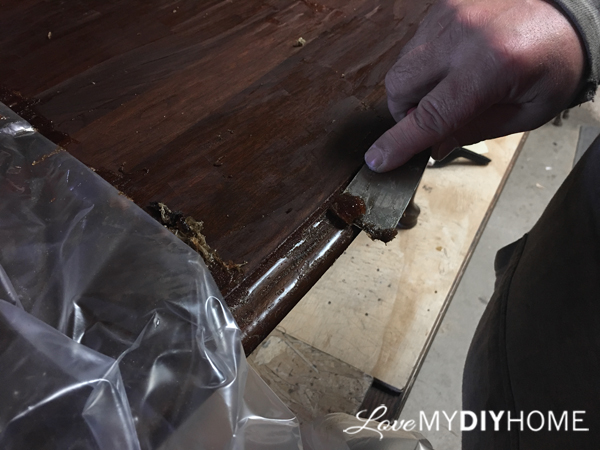
He spread it on, covered it, and we left for church.
When we got home, it was ready to be scraped off and was quite easy. (afflink) Soy Gel is a furniture flipper’s preferred stripper because of how well it works and lack of smell. Normally it wouldn’t be necessary to cover it, for it works quickly, but we didn’t want it to dry out before we could get to it.
After scraping the gel and finish, he cleaned it off with water and then with mineral spirits.
After it was totally dry, he sanded the top to take care of the scratches and fixed the dents and dings with (aff link) Durhams Rock Hard Putty. You just mix it with water and apply. The nice thing about (aff link) Durhams is that it doesn’t shrink and dries very solid.
Old Fashioned Milk Paint
From OFMP: Our milk paint colors were developed to match the furniture and buildings shown at several restored villages including Old Sturbridge Village, plus museum displays in such places as Boston’s Museum of Fine Arts, New York’s Metropolitan Museum of Art, Winterthur, Colonial Williamsburg, Philadelphia Museum of Art, Wadsworth Atheneum, etc. The original Colonial pieces we copied were painted with home-made milk paint, with vivid colors and a most beautiful look of velvet.
The Stain Started Bleeding
Since I wanted to try out the two OFMP greens, (aff links) Lexington and Tavern, layering seemed the best way to go. The first layer was (aff link) Lexington. I added (aff link) Extra Bond after a bit of research, since stain came off onto my sponge when I was cleaning in preparation for painting and I didn’t want to use shellac. The supposition is that the (aff link) Extra Bond would seal in the stain if I mixed it into my first layer of OFMP. It covered well with not a hint on the dark stain bleeding through. So far so good.
I ran a 1000 grit sanding sponge over each layer just to keep it smooth. I totally love how this (aff links) OFMP paint lays down on bare wood. I always worry the paint won’t stick when going over another finish – this definitely won’t be a problem with the OFMP since we stripped this piece. Whew.
Lexington Green – A Tiny Set Back
When I was painting the legs with (afflink) Lexington Green, I dripped a bit of paint onto one of my finished pieces and it dried before I caught it. I tried sanding it off and the paint resisted to the point that I had to chip it off. After that, I sanded to smooth out where I had peeled off the drip and the paint was so bonded with the wood that it was nearly impossible to sand off. I was impressed at how well the paint stuck!

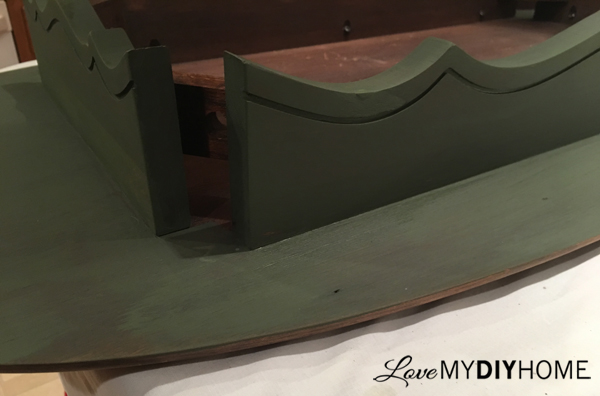
Next Came Tavern Green (afflinks)
- Two coats of Lexington Green with Extra Bond, lightly sanded between layers
- Tavern Green, haphazzardly painted over the Lexington with a sponge to give a look similar to marble.
- For dimension, the top layer of Tavern Green sanded just a bit to expose the bottom layer lending a weathered/worn look
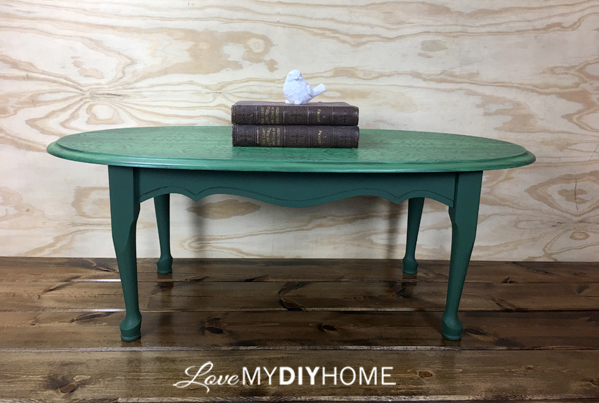
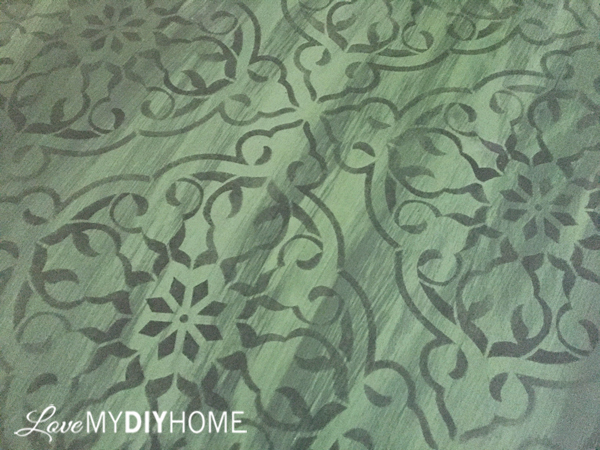
One thing I really like about (afflink) Old Fashioned Milk Paint – it takes on its own look depending on your lighting. In this photo you see a bright lime green over top a dark grass green. This was taken at night with just overhead lights in my kitchen. The next one is the same table in the morning with natural light.

Kitchen Overhead Lightiing
 Morning Natural Lighting

But then take a look at this sneak peak at the table while I’m stenciling it:

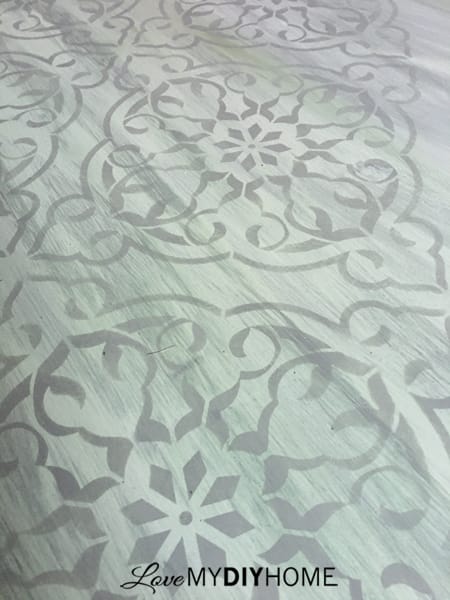
Morning Natural Lighting Closeup (Isn’t it gorgeous?)
Details Make All the Difference
The layering and distressing is well and good, but detailing makes a piece unique. Stenciling the (afflinks) Lexington Green over the second coat of Tavern Green gives you a faded, distressed look without sanding because the paint used is the same as the base coat. The combination kind of fools the eye because of the layering.
The Top Coat
I let it dry for a day and then top coated the legs with (afflink) Polyvine Dead Flat. It was a beautiful finish. I used Polyvine Satin first on the top and then several layers of the Polyvine Dead Flat on top of that. The satin gives it a more durable finish, so that was a base coat.


It took me a few days to do the topcoat because of family stuff going on. After it was completely dry, I added a bit of (afflink) Daddy Vann’s Antique Brown wax in the grooves to give it a just bit of added character.

Thanks for visiting. Do you have a “Bertha” in your home? Let me encourage you to rather than toss it out and buy new, to refresh it with paint or stain to give it a new look and make you love her again!
TTYS!

 * Disclosure: This post contains affiliate links. If you buy anything after clicking on one of the affiliate links, I receive a small commission of the sale. The cost to you is the same, and I only link to items that I think would benefit my readers. Your support of this blog is greatly appreciated. This was also a sponsored post. Old Fashioned Milk Paint Company graciously supplied the products to flip this table in exchange for an honest review.
Oh Val you did a bang up job on this one, I adore the finish you created for the tabletop, the stencil blends in beautifully with the layered paint. Love your results!
Thanks so much, Brenda!
This is such an impressive makeover Val! All of that work to scrape off the old but so worth it. And the stencil really adds so much dimension to the table. I can't wait to see what you are going to do next!
Thanks, Mary! I was just checking out your site! Very nice.
A labor of love….what a nice job!
Thanks. I DID love doing it!
.
That looks great. I love the top stenciling!
Val this was quite a process that you went through. But so, so worth it. Bertha has been transformed into a work of art. All those beautiful layers and the changes in the colors. And I see that you are still not finished with her. I'll be looking forward to seeing how she ends up when you are finished working your magic.
Thanks, Mary!