In How to Upcycle an Antique Door Part 1, I showed you how I had painted brown on one side. Now I will show you what I did to the other side. I kid you not – this is by far the coolest project I’ve done and you could for sure do this yourself.
Now you’ll see what I did to the other side and the end product.
Here are the two sides…
IN THE RAW
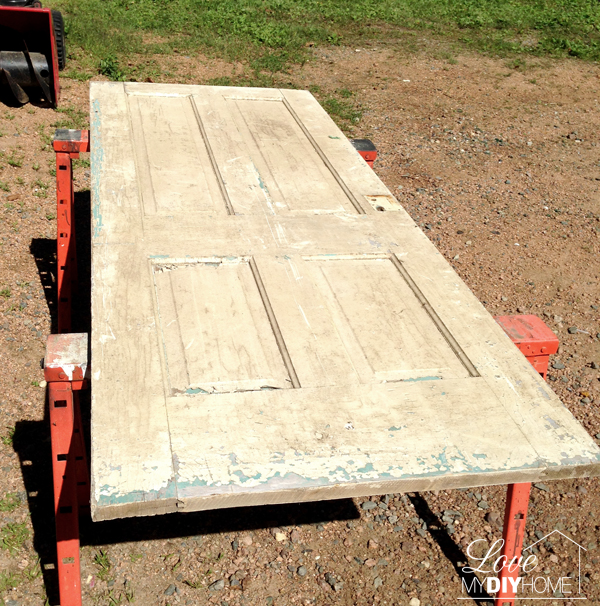
This is the one side that I painted brown that you read about last week.
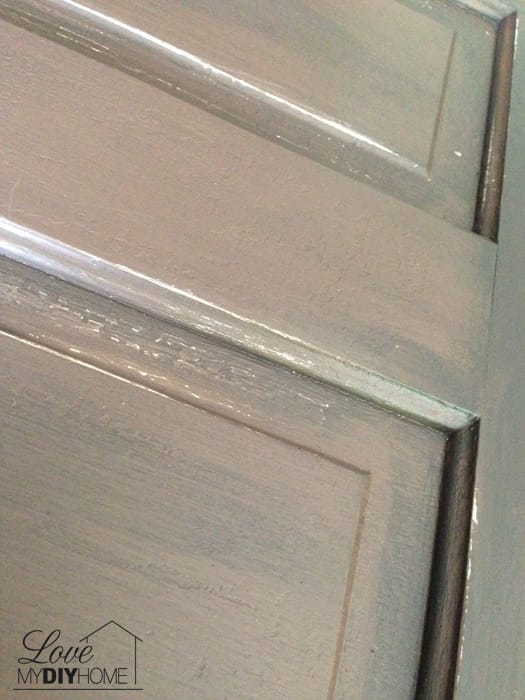
Now let’s look at side two.
(Affiliate Links)
Rust-Oleum 2x Painters Touch Spray Paint
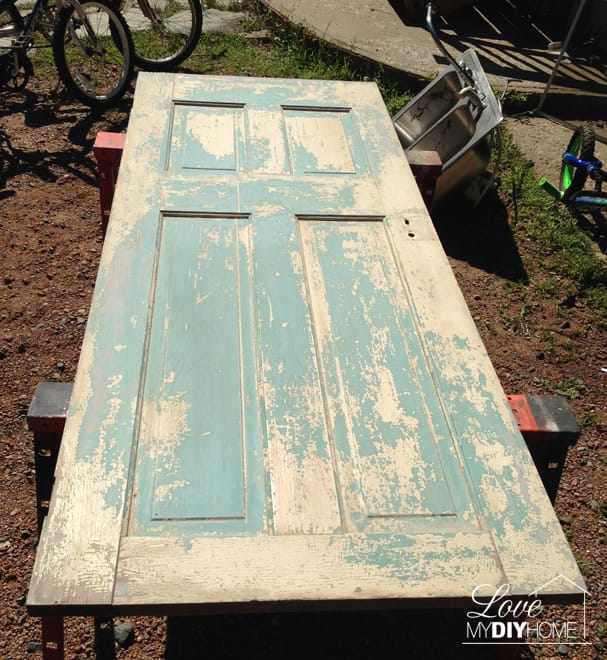
Step One – Side Two:
- Clean and sand, but not so much that you lose the textured layers of old paint.
I used a (afflink) Sanding Sponge, Fine/Medium.
These sanding sponges are easy to use and if you don’t use too much pressure, you can preserve the alligator chippy look of the many layers of paint, yet still get off the loose stuff.
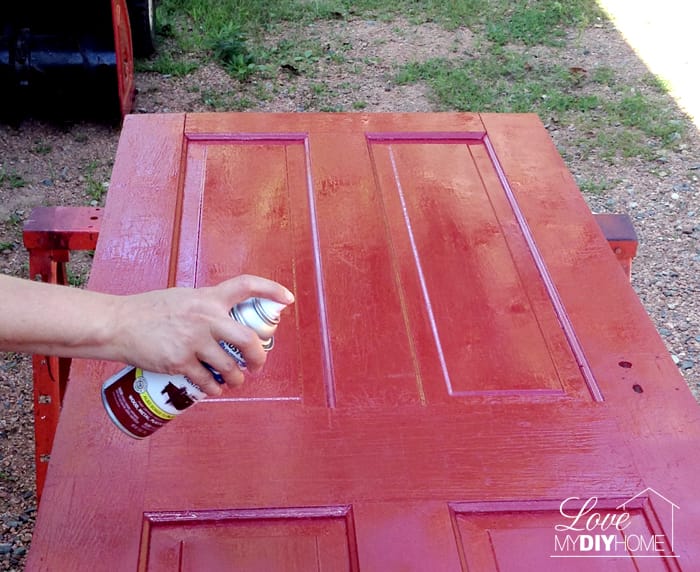
Step Two – Side Two:
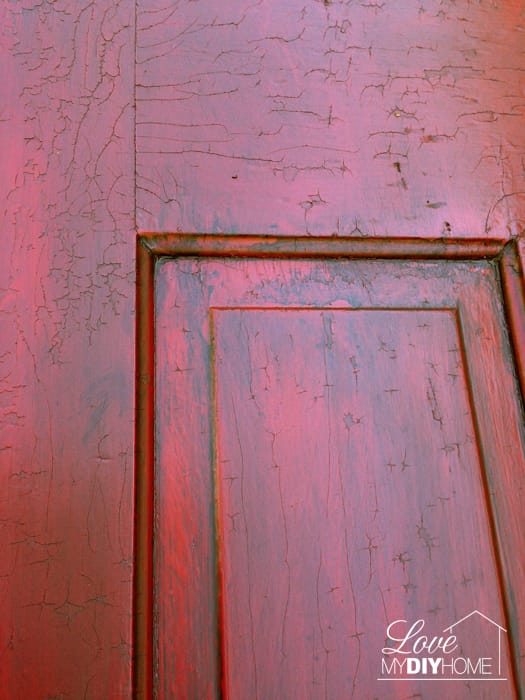
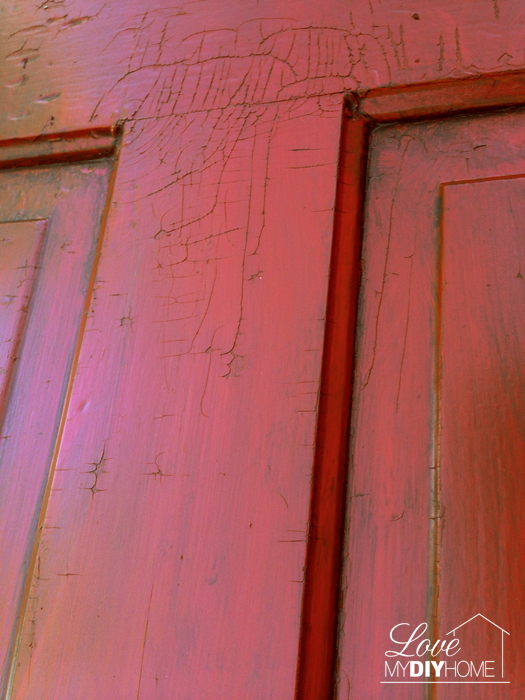
- Paint the door using red (afflink) Rust-Oleum 2x Painters Touch Spray Paint.
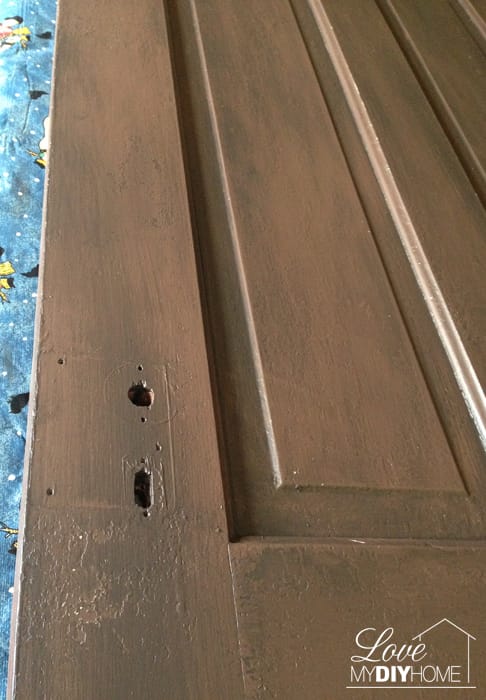
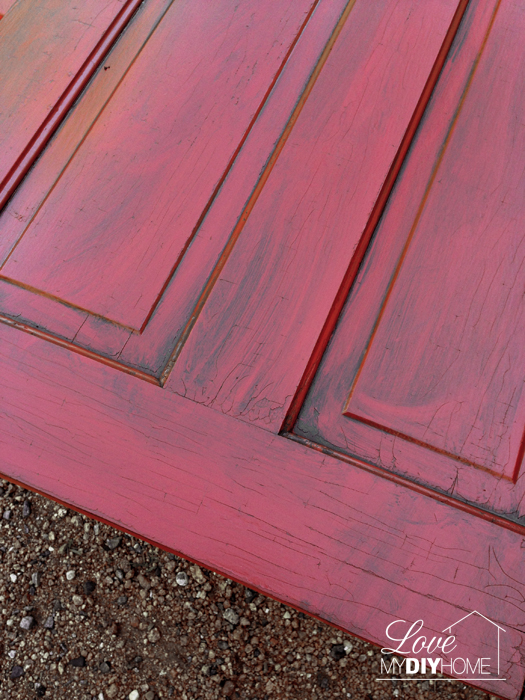
Step Three – Side Two:
- Bring back the antique look.
To bring back the antique look, paint on thinned out dark brown paint over the red, rubbing it off in spots with a rag to create the old world-ish look. This gave it quite a dramatic look compared to the other side of brown on brown.
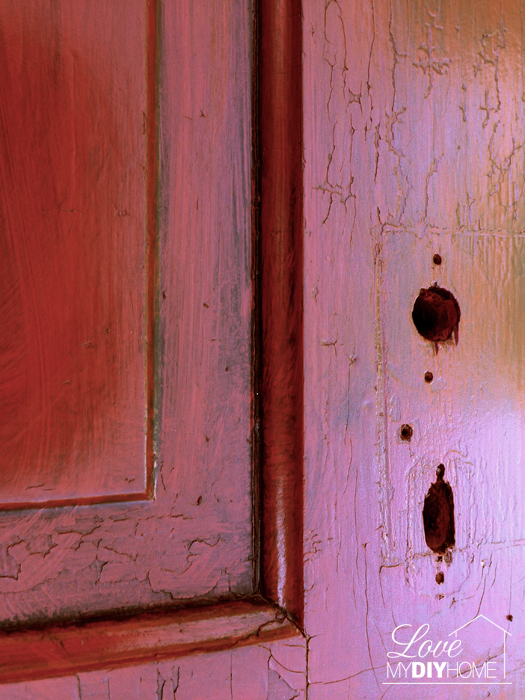
I could only gawk when I saw the result – absolutely amazing. Have you ever done a project that turned out so well that you couldn’t believe YOU did it?
Step Four – Side Two:
- Paint on (afflink) American Decor Creme Wax to seal and protect.
You can get this at Menards or on (afflink) Amazon.

I did this because I want to be able to flip it over and use the brown side. The plan was to use this door as a hall tree with coat hooks and mirror with a bench.
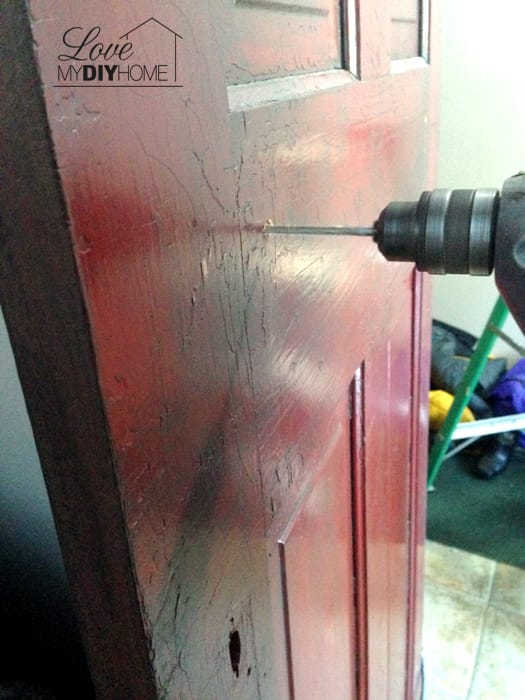
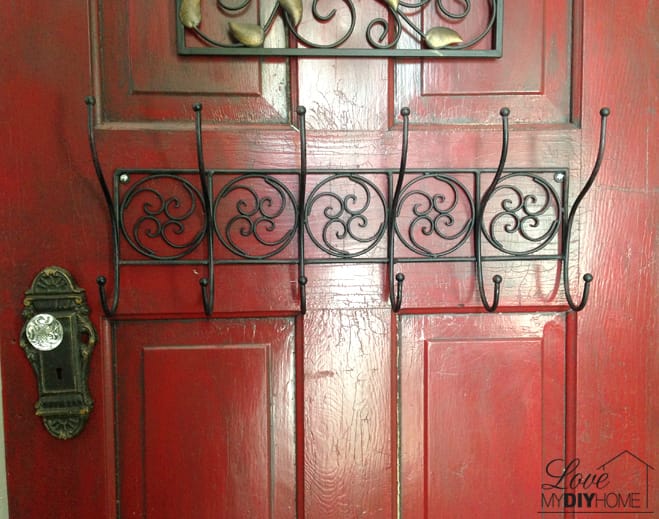
In order to be able to flip the door to use the brown side rather than red I needed to figure out a way to take off the hardware and use it on the other side without a big ta-doo. My DH, mastermind of all good things, figured it out.
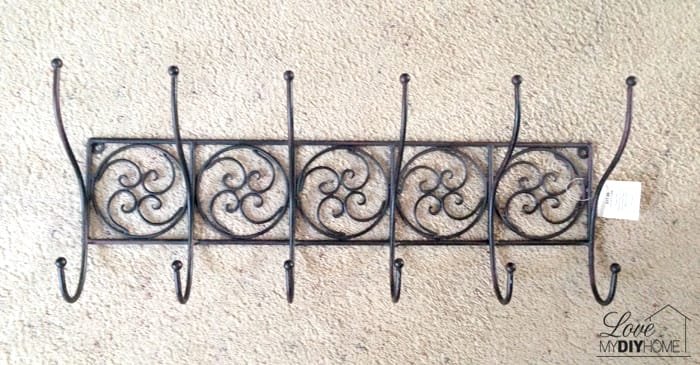
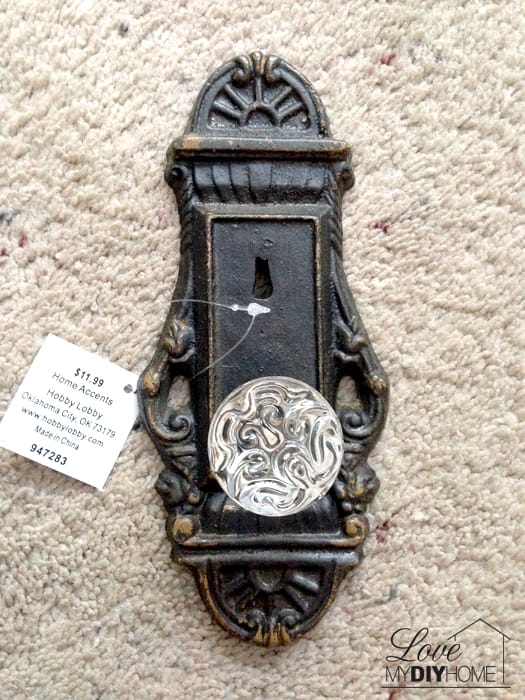
(afflink) Hobby Lobby had a 50% off sale on hooks, knobs and a really cool antiquey door knob.
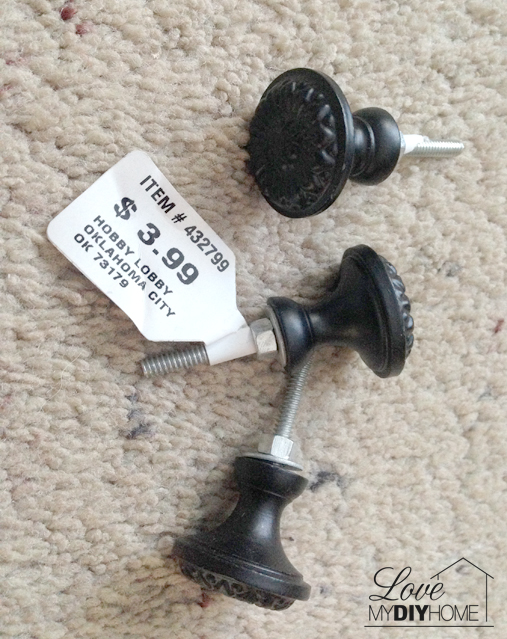
I attached a mirror my daughter gave me for a Christmas gift a year ago. I used the (afflink) Hobby Lobby knobs to hang the mirror with the same method I used to hang the coat hooks, by drilling a hole and securing it with an nut and screw.
The door knob has a key hole on the back that made it easy to just hang it on on a screw secured with a nut in the same way as the other pieces, also from (afflink) Hobby Lobby.
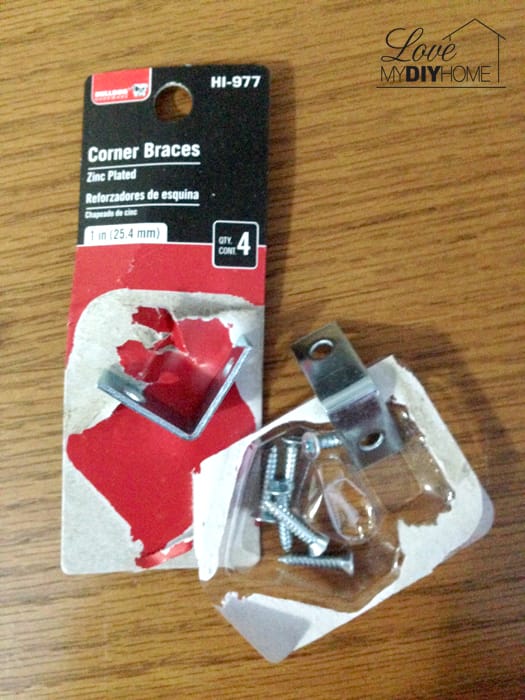
Be sure to anchor the door to the wall.
At one time my door was just sitting against the door and a grandson knocked into it and it fell over. Fortunately the wall on the other side caught it before doing any damage.
We used a (afflink) 1 ” corner bracket to secure it to the wall.
A homemade hall tree is not only less expensive, but it’s a one of a kind that fits your decor because you chose each color and added hardware piece – not to mention that it means so much more to you if you’ve created it yourself.
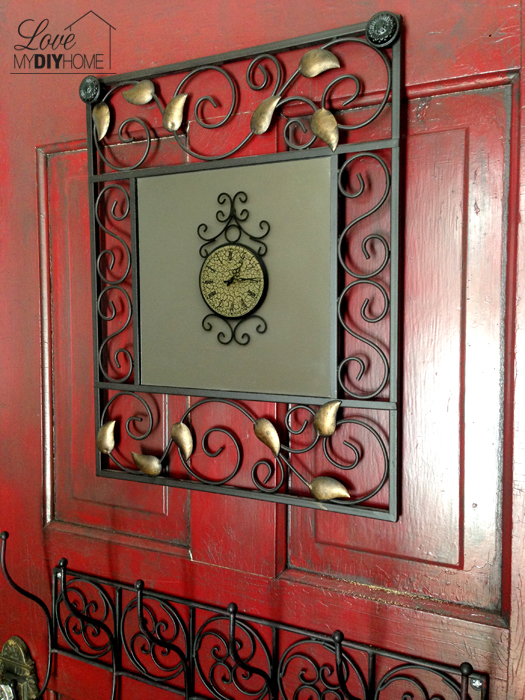
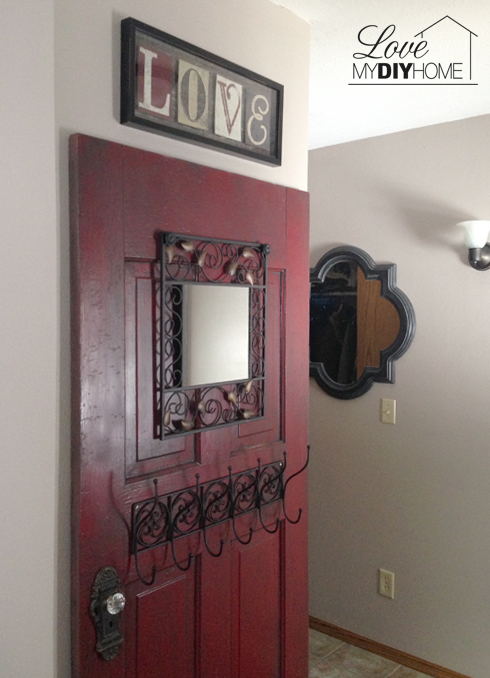
This is the mirror that was attached with the knobs in both upper corners – btw, see that clock you see in the mirror across the way? I snagged it at (afflink) Hobby Lobby a few years ago for $8 on clearance.
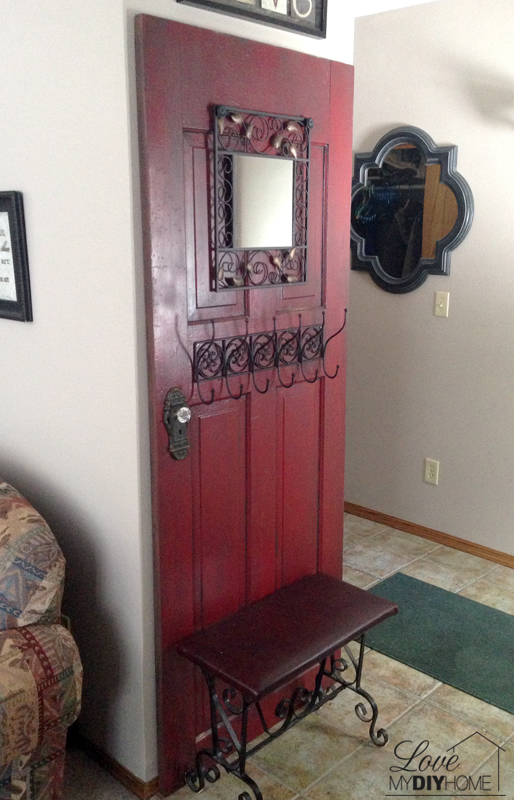
The coat hooks are very sturdy, both in workmanship and how they are hung so they will make a great rack for guest coats.
The door is securely anchored to the wall, but can easily be taken off and flipped, though I don’t think I will get tired of the red any time soon.
So here you go. From this:
To this:
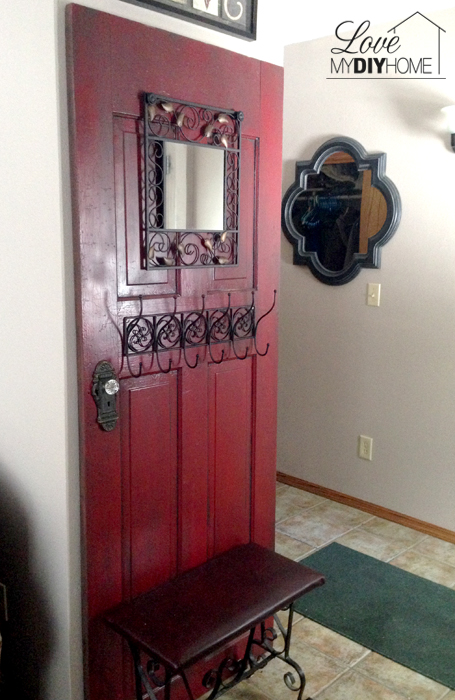
For now we have a little antique bench in front, but plan to replace it with a larger, sturdier wooden and even maybe upholstered bench. That too will have to be removable so I can use it on the brown side.
This was not only an EASY project, but fun as well! My 9 year old grandson helped me with it. Sanding, painting and mounting hardware – with a little vision you can do great things and walk away pleased with your project.
I just came home from a week in Virginia. I was pleasantly surprised to see this new hall tree when I walked through the door. Such a great surprise to see my project right there, greeting me! Do you want that type of satisfaction?

Join our community if you’d like to receive FREE stuff like word art, tutorials, etc. along with tips and such. You like free? How about a FREE PDF of 5 Homemade Chalky Paint Recipes?
If you are a furniture flipper, come join our Facebook group @furnitureflippingforum.
Click the Pic Below! vvv
Thanks for visiting,


This is simply beautiful. Thank you so very much for linking it up with us at 'Share it One More Time'. Love how this came out – an inspirational journey!
Thanks, Rose. It was a fun project. Thanks for hosting the linky.
Oh, how pretty this is. You did a great job and I love the color you used on it. What a nice way to greet your visitors.
Be a sweetie,
Shelia 😉
Sheila, it took me a bit to get brave enough to use the red – especially since I didn't want it to be bright, hence the brown paint over it to tone it down. The entry way is such an important way to greet friends, you are right!
Gorgeous! I love the embellishments – and what a unique way to hang up coats!
Thanks for sharing and for linking up to the #SHINEbloghop.
Wishing you a lovely day.
xoxo
Thanks, Jennifer. It was fun picking out what I would put on the door. My grandson especially enjoyed the hunt and it helped that Hobby Lobby runs 50% off often! Thanks for coming by.
Gorgeous! You did a wonderful job. Thanks so much for sharing.
Thanks, Debbie. It’s like your blog name – it’s the simple joys in life that make it fun.
What an amazing job you did! It's way beyond my bravery and skill level, though I did paint the outside of my front door last summer when I painted the porch.
BTW, I've added your site to my blog's list of CommentLuv enabled blogs. 🙂
Beth, just grab a can of spray paint and go at it – no skill required and you learn how to do different looks as you go along and get braver after each project. Really, go for it and let me know what you’ve done! Thanks for coming by.
What a beautiful door – I admire people that can do this so much. I might be tempted to join the crowd of those that can!
Oh, Christina! You definitely need to become a DIY’er – it’s so much fun and rewarding. I love coming home to my finished projects, especially this door I just did. It a nice thing to see when you walk in the door. It doesn’t hurt to show it off to friends either!
Ooh, this is so cool! And thank you for all the detailed pictures, they help DIY posts so much. Now if only I had an old door lying around, I'd surely do something like this now that I see how great it looks!
SW wife, you might find an old door at a garage sale or auction this spring. People like to get rid of stuff that’s been sitting around during their spring cleaning – I know I need to! Let me know if you find one and what you end up doing with it.
This is such a great idea! It looks so wonderful in your home. I find it inspiring when folks can transform things that most people would find useless into a real treasure.
Isn’t that the truth, Laura? One man’s junk is another woman’s treasure. We throw away way too much stuff and turn around and buy new. I think this economy has turned things around a bit. People are becoming so resourceful. Thanks for visiting.
Great project. I love making old things look new!
You and me both, Felicia!
Stunning!! I love this! I so wish I were more creative and could create stuff like this. My husband and I are planning to build a home in the next couple of years and I will definitely keep this bookmarked for future projects!
Candi, thanks. Honestly, it doesn’t take a lot of creativity. Just grab a can of spray paint and experiment! Feel free to contact me if you need help.
Oh my goodness! That is simply beautiful and innovative. I love what you did with the color schemes too. I wouldn't have though about using an old door to put together an entryway bench. Now I wish I had an entryway 🙂 I simply love this. 🙂
Keelie, you can put an old door so many places! How about a headboard or on the wall behind your couch with a shelf at the top? I saw in a furniture store here in town a room that the walls were covered in old doors. My newsletter had a link to a building out east that had the outside covered in red doors top to bottom!
I adore the red!! What a fun project! My mom was a huge fan of antique doors and uses them for all sorts of things!
Cami – I would love to see some pictures! Woud your mom like to have them featured? Antique doors upcycled is such the rave right now. Let me know…
That door is beautiful! I had to laugh as I was wondering how you mounted that clock on the mirror and it turned out to be a reflection. 😀 It was definitely worth all that work you put into it!
LOL, Staci. I thought it was amusing to center it in the mirror! It just goes to show you that we DIY bloggers really manipulate our photos! Thanks for coming by – it WAS a fun project.
Wow! That is amazing. I do not have a crafty bone in my body. All decorations in our home are compliments of my husband (who fortunately has very good taste.) Hope you have a chance to sit back and enjoy your beautiful work now that it's done!
Thanks, Jennifer, but I bet you could be crafty if you tried, and it’s so fun I highly recommend it. Try a small project. Spray paint it. Done. Easy peasy.
Wow! what awesome work. You could totally sell those! I love the red door 🙂
Shannon, we bought several of those doors in an auction and have thought about selling them. I think they would sell well – but would be so very hard to let go!
This is gorgeous! I would love to have the time and money for DIY projects like this. I would also love to be crafty enough to pull this off! But you are amazing and do a wonderful job!
Thanks, Amy. You should give it a try – squeeze out some time. It’s such a good de-stressor. Just grab a can of spray paint and away you go!
What a beautiful idea. Thanks for sharing. I love it.
Thanks, Michelle.
I loved reading this! I am so going to try this one day!
Katisha, let me know when you do and send me pictures!
Beautiful work. I love how it turned out.
Thanks, Jaime.
This is so awesome! My parents have a door or two lieing around. I will ahve to show my dad he would have fun with this.
Angela, you definitely need to go get a door from your parents! It would be a fun project to do with your Dad as well. Have fun and let me know if you finish the project, I'd like to see a picture.
What a beautiful project you did! It's amazing how you took an old door and turned it into part of your decor. I love the idea.
Thanks, Lisa.
You did an amazing job! Just pinned it. What a great piece for that space.
Thanks, Cristin for pinning it!
Oh my goodness, that came out incredible! What an awesome DIY project! One of these days, I want to get into upcycling, too!
Thanks, Jennifer. You would like upcycling – I highly recommend it!
Wow, I love this! I am so impressed by people with DIY skills. Beautiful project!
Thanks, Deb. I like the name of your website, Counting My Blessings!
Great ideas! This looks gorgeous! My husband and I just spent a bunch of time looking at coat hooks and such for front doors. One that we found was very similar to this (not a door, but the same size and made of hardwood) but way too expensive for it! I'll have to show him this and say "all we need is a door!" 🙂 Thanks for sharing!
Bonnie, it was super easy and quite the conversation piece. I highly recommend it. I’m thinking about doing a headboard out of a door too.
Wow!! Gorgeous!!! I've never done anything like this, but with your great direction and photos I think I could now!! Thank you!! 🙂
Thanks, Pam. You can do this, go for it!
Very nice. If I had half your talent I'd be happy. I'm not very crafty but clearly you are. Awesome.
Barbara, the intent on pubishing these DIY projects is to show you that it’s not about talent – it’s about having fun, experimenting and finding out it’s not as hard as it looks.
This is so pretty! I love doors as artwork or accent pieces in a room. It is neat how you used this particular door and upcycled it. Awesome 🙂
Thanks, Felicia. I visited your blog and liked it. Keep up the good work!
This is delightful! And you make it look so easy! All I need is time… 🙂
So pretty! It fits that space perfectly and I love the hooks you found!
This is beautiful. We are purchasing our new house in July and I have this on the project list. Pinning for later!
This is a really nice transformation. I love to see things become something more beautiful than what they started out being. Thank you for sharing your project with us.
I love it when a project works out the way you envisioned it! It doesn't happen too often, but the surprise is always worth it.
Wow! What a transformation, and the color is amazing!
Thanks so much for shairng at AMAZE ME MONDAY!
Blessings,
Cindy
The red is beautiful. I love what a rich, deep color it is. Definitely would love this in my home!
Very creative and so pretty. I'm redesigning my kitchen and now I'm seriously considering using an old door as a splash back. I can see it now with lots of hooks for hanging pots and pans. Thank you for the inspiration. x
Now I would love to see that! I do love the idea of lots of hooks. Send me a pic when it’s done!
What a wonderul transformation! Thanks for sharing at What'd You Do This weekend? I hope you will join us again this Monday morning 🙂
I love the crackled look to the door, and the vintage looking glass dorr knob is to die for! Defintiely pinning!
Cristina, thanks! I love the cracked look too. I was pretty amazed when I saw the results after painting it. Thanks for pinning.
I love this! I want this! I don't have a place for this! Now what do I do. Thanks for sharing this amazing project.
Phyllis, when I got these doors (I have several) I had no idea what I was going to do with them but I found a place. I bet you could too. I’m thinking about making a headboard for my new king bed in our guest room. I thought about using them to line one wall or a half wall. Send me a photo when you find your perfect spot in your home.
Absolutely stunning! I love pinterest for crafty inspiration and I must say you did a fantastic job. Thank you for sharing your inspiring work.
I love this. I think I actually like the way it looked before it was painted. We live in a log home, and I love the primitive look, so I loved how it looked in its "raw" state. Thanks for sharing!
Amazing job. No way I could find space in my current home for this, but I bet I could do something similar as a headboard. Thanks for the inspiration.
I love this project so much! I just got back from a vintage market with my sister and we were wondering about what kind of wax to finish things off with. I'm sending her this post right now to tell her "go look at Menards".
I really liked the Wax I used. I just bought Annie Sloans and will be trying that out soon.
Wow! I absolutely love this idea. My husband and I will be purchasing our first home within the next year or so and this is something I would like to try. Thank you for sharing this.
How exciting for you! I hope you find just the right house.
Wow that door looks gorgeous! I would just put it on my front door!
I so love what you did to this old door. Any project that is about recyling I am all for. Thanks for sharing.
Well done tutorial. I used to dabble with faux paint stuff way back when. This inspires me to try again…if I can just get away from my easel and oil paints! What would we do without paint?
John, true that! Paint has changed my life. Your paintings on your website are super cool!
What an inspiration! Thank you for sharing. Well explained with all of the added photos. Well done!!
Thanks, Kathy. It’s one of my faves.
Wow Beautiful. I bet that would look nice as a headboard too. I may try your technique on the two doors I have to make a headboard for our bed. Thank you!
Be sure to show me when you are done!
This is awesome. I’d love to share this with our clients as well once they look for something like this. Hope you can produce more contents like this. Awesome! From your friends in Atlas Door Repair.
Beautiful technique! I really can’t wait to try it out!
Thanks!