
I found a pair of end tables at a garage sale – outdated and in need of repair.
You see it everywhere. Furniture that is chipped, stained, damaged with water rings, cracks, or maybe they are just plain outdated. Too often folks just go out and buy new when there is a better, cheaper, and easier fix.
We can save money and save the the landfill by taking them home and flipping them…
BEFORE
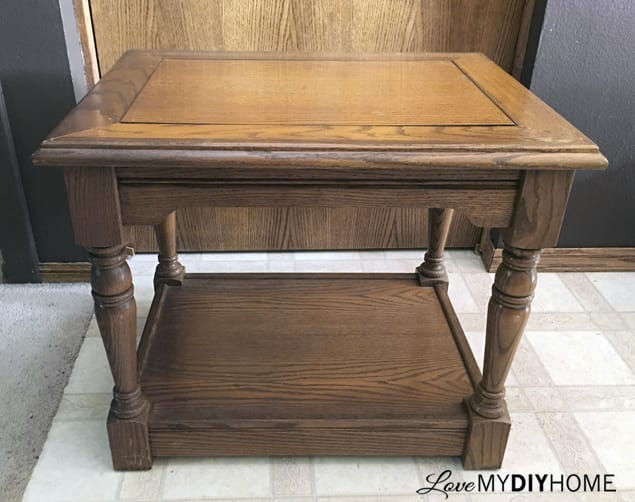
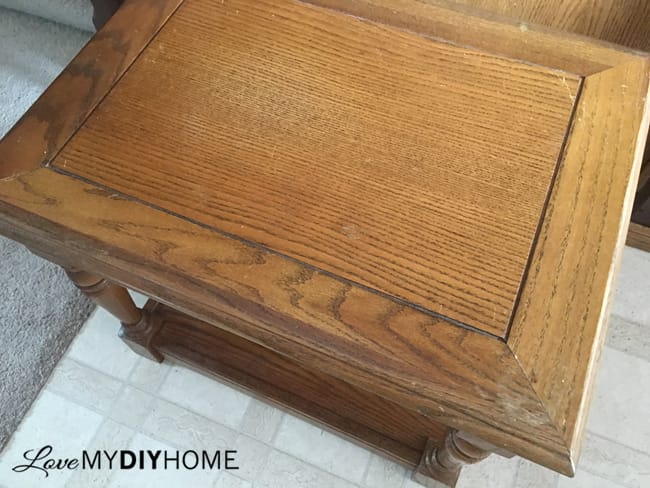
In this case all they needed was a bit of glue (the center piece had come apart), a bit of patching, and a new finish.
 Karen at Wise Owl Paint offered to give me paint and glaze for a project to try out and review. The paint is free of harsh chemicals and solvents and is zero VOC – a great way to paint without compromising health or the environment. She also carries other products like finishes and brushes.


Since I now had opportunity to try out the Cling-on brush I decided to use my old one and this new Cling-on and compare brushes, starting out with my round chalk brush from Amazon. I had used the brush numerous times, so I thought there was no need to worry about loose hairs. I was W.R.O.N.G. Have you ever spent a lot of time picking off brush hair out of the paint? Ugh. So frustrating.

When it came time to glaze, I used the Cling-on brush. Oh my.
They are hand made in Holland and are designed for water base products, available in round, oval, flat, and angled. Karen sent me a flat brush, which I promptly fell in love with. Baby, it was smooth and it lost not one hair!
Your brush can make a difference in the finish AND prevent you from chucking your piece of furniture right out the window! More on that later…
Let’s get on with the steps:
1. Clean your furniture well, and then lightly sand it if there is a finish. Using a deglosser is an option as well. Often we are told that there is no prep work for chalk paint projects, but it’s better to be safe than sorry. You want the paint to stick, so take some precautions. You never know what has been sprayed on (like Pledge) or spilled on used furniture.
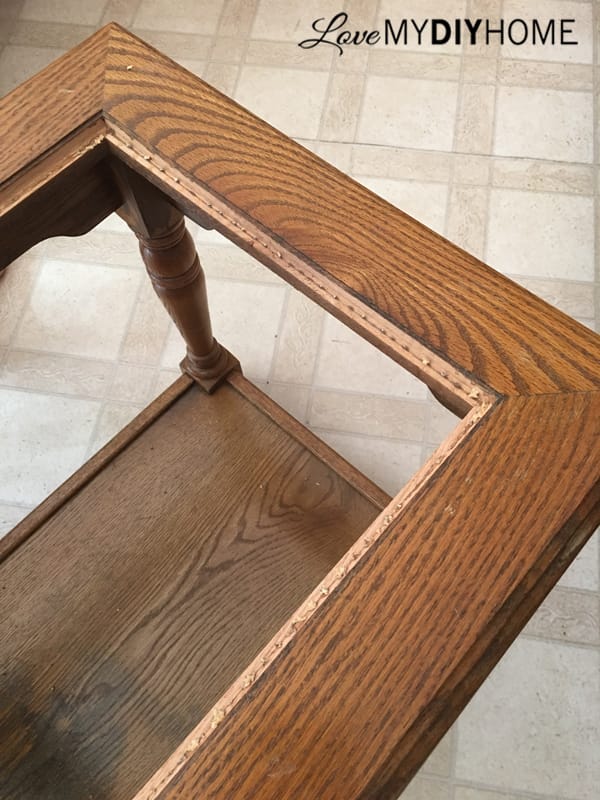
2. Fix any issues like cracks, scratches or damage to the veneer. You might even want to prime it. In this case, I primed where my DH patched a deep scratch. We also had to re-glue the center panel. OK, DH re-glued the center panel. He was earning his keep.
3. Wipe off the dust from sanding. I used a little electric hand sander, so there was a fine layer of dust.
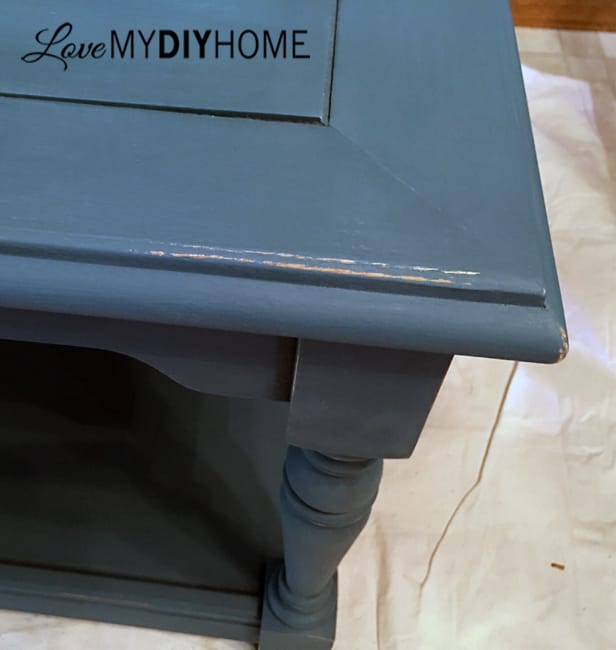
4. Paint. These tables took 2 coats. Be sure to let the first coat dry well before starting the second coat because the first will pull up if it’s not fully dry. I waited 3 or so hours and thought it was good, but a bit of it came up with the second coat. It was quite humid that day, so I should have waited longer. The next day it was ready for the second coat.
This Wise Owl Chalk Synthesis paint went on so smoothly. Between the Cling-on brush and the quality paint, painting these tables was a breeze. Just be sure your surface is prepared and the first coat is dry before applying the second. It’s not unusual for there to be user error – since I’m the user, that is the case quite often. I’m often proving I’m human.
5. Lightly distress it with sandpaper or a sanding sponge after it’s dry. You can wet distress before it’s dry with a wet rag. It all depends on the look your are trying to achieve. Experiment!
It’s always mind boggling to me to see each stage of the transformation materialize. When I paint the first color, I think,
“Oh, I love that, maybe I’ll just keep it as is.”
Then I decide to distress it a bit, not too much, just enough to give it a bit of character and then I think,
“Such an improvement, maybe I’ll stop there.”
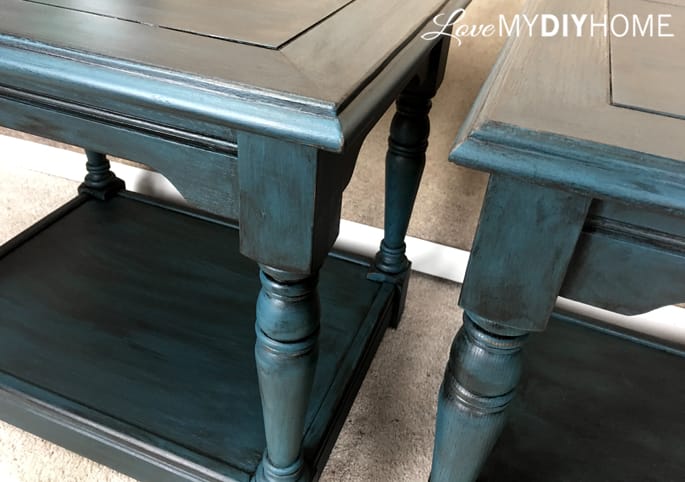
I do the same dance with every piece – you’d think I’d learn. Here it is painted, distressed, and lightly sanded to ready it for glaze. With this paint, a light sanding will smooth it out and not allow the glaze to soak in too much.
This time I had already planned to glaze it, but until I saw the glaze on, I thought it was already good enough. Boy was I surprised to see the outcome!
Karen sent me black glaze to antique it and give it a nice protective finish. The glaze protects the paint as well as adds dimension.
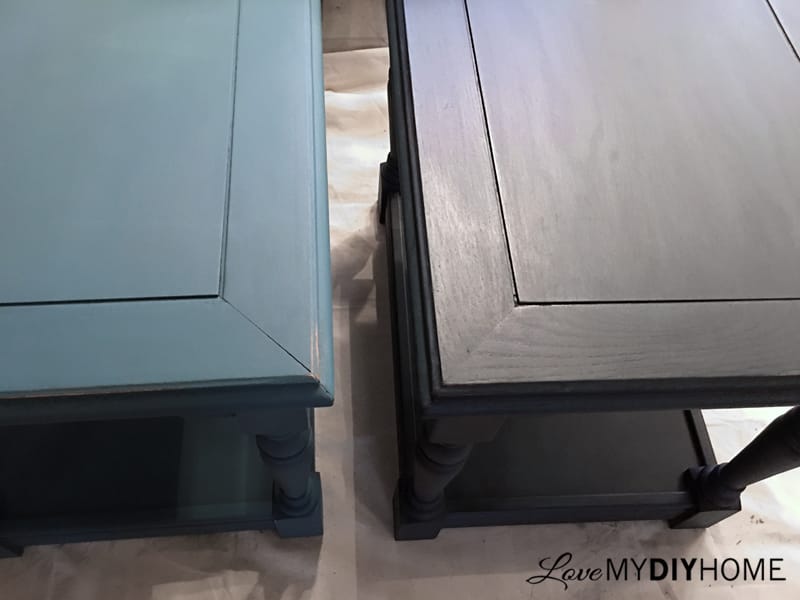
When we set the first one that we glazed next to the other one that hadn’t been glazed yet, we couldn’t believe the difference. Even my DH said,
“WOW, I thought I liked the first one, just painted,
but I like the glazed one so much better.”
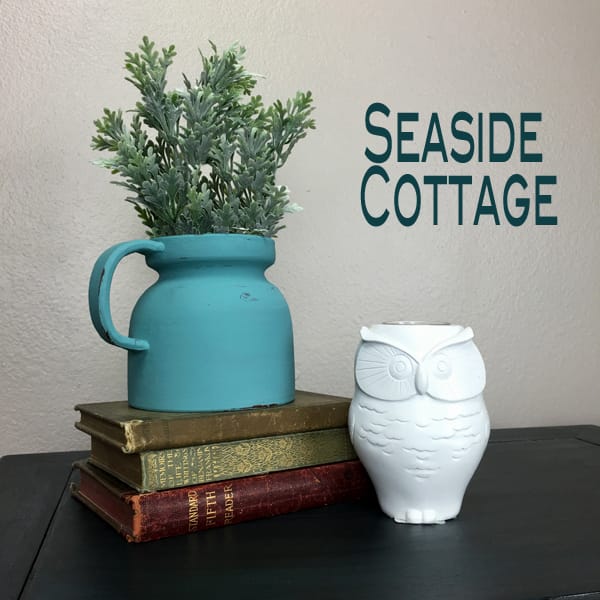
BTW… Karen sent me some samples of two other paint colors, one of which is new. Take a look at the Honey Pot Planter I painted with her new color, Seaside Cottage.
Back to the tutorial…
6. Paint on the glaze and wipe off, keeping the nooks and crannies filled with glaze. This was a bit of a learning curve. I’d watched several videos of glazing and antiqueing, but you really do learn as you go – a kind of on the job training.
I discoverd that a heavy hand can cause the paint underneath to come up, that the glaze will thicken if you leave the top of the can off too long (which happens when you are glazing!), giving you a different look each time because the consistency is different and it dries faster, and that it is best to do the entire project in the same day, the same way or you won’t end up with matching pieces. Live and learn…what better way than learning by doing?</span
Oh, and btw, use a damp cloth to wipe the glaze off!
Here they are side by side, one glazed, one not:
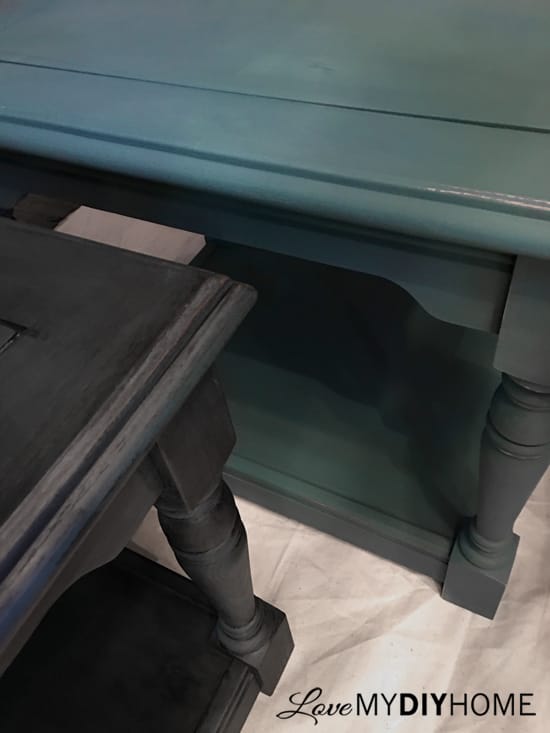
You can lightly glaze your piece or apply more coats to get a darker look. Because the camera picks up the glaze more readily, it makes it look like the table has completely turned another color, but it’s just an optical illusion. See how the glaze accentuates the grain of the wood?
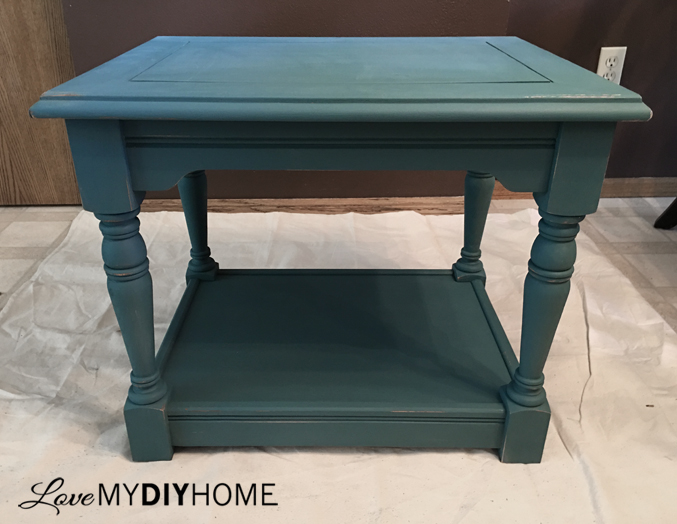
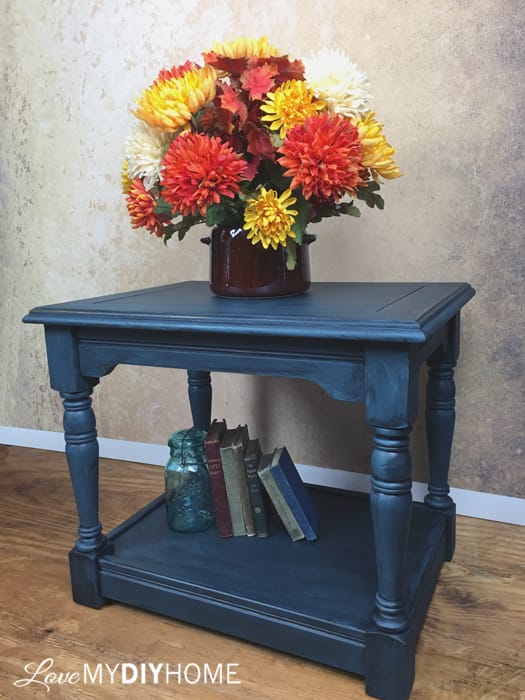
There is nothing like the feeling you get when you remember what they piece looked like before and then seeing it in action, sittin’ all pretty…
AFTER

The nice part of flipping furniture is that you can create whatever look you want. It may take a bit to learn the technique, but that’s the fun part.


Watch videos, ask questions, get on a facebook group (or join several like I did), read blogs (like mine!) and take it one step at a time, learning each new technique as you go along.
Read. Learn. Do. Read some more. Then go out and do.
Don’t be afraid to experiment – what’s the worst that can happen? You can always buy more paint! BTDT!

A big thank you to Karen at WiseOwlPaint.com for the paint and glaze – it’s always a blessing to try new paint products and when they are given as a gift, the more better.

Be amazing!


I love what you did with these tables Val.
They were just blah before but the after is WOW.
The Nebula color was nice but with the glaze -BAM.
The fact that no top coat is needed is a PLUS.
I must check them out !! Thanks
I think I’ve decided to put a top coat on them anyway. I’m just not wanting any chance of a water ring or scratch happening since I’m going to sell them.
What a transformation, what a beautiful color and after you applied the glaze it turn out like another pice. Thanks for the tutorial.
Thanks for stopping by!
Those tables are absolutely beautiful!
Thanks so much!
So beautiful. Thank you. I live in Canada but I love everything you do.
Thanks, Francoise!