#sponsored
While shopping at a Restore in MI
We happened upon their 50% off furniture day. I found a three drawer nightstand that would be perfect for my DH's (darling hubby) side of the bed. I already had one that I had repainted for my side of the bed and he had my mom's little antique table that wasn't nearly big enough for him and all his junk...all his precious possessions.
He needed drawers to hide all his stuff, so this at $20 fit the bill.
And of course I have to start with the before:
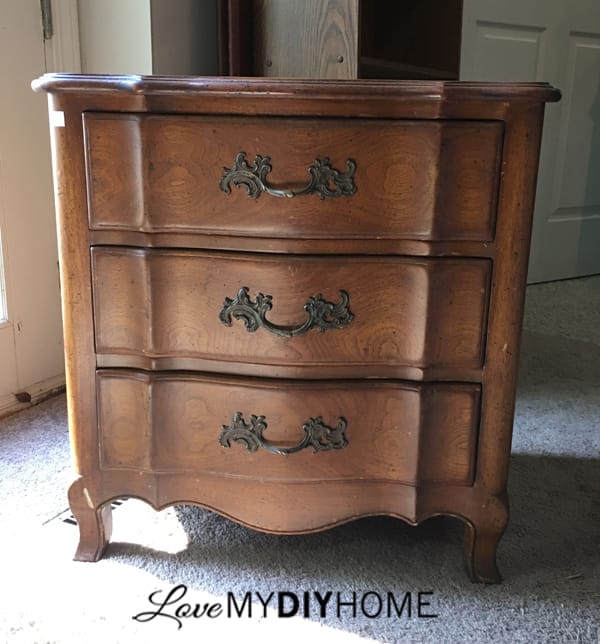
There is so much to tell about about this one. Lot's of improvisation, creativity, and experimentation was called for, and I'm glad it turned out well because it was for my DH's Christmas gift.
I used a ton of resources for this project - I'll list links below, grouped according to each process, so you can go take a look if you are wondering about specifics.
Materials Used
(affiliate links for your convenience are in red)
Prep
Raised Stenciling
Painting/Staining/Topcoating
Hardware/Decorations
After cleaning, I tried to sand out some dents and scratches.
We didn't know it had a very thin veneer, so when I sanded, it quickly came off in spots. So I had to decide to either take it all off or get creative and add to its character. I decided to go with it. I sanded it more - enough to give it a textured look, pits, valleys, etc. It would become "time worn."
Staining
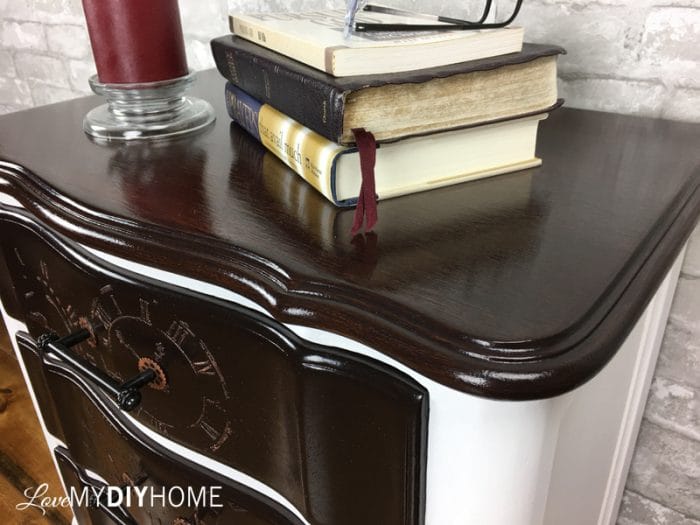
I stained the top and drawers with one coat of (afflinks) Java Gel with a staining pad. I didn't wipe it off and wasn't going for a full, even coverage. I liked the look of the top, so I left it as is and topcoated with General Finishes Wipe on Poly. Since it's for DH, I put on 5 good coats. I also stained the drawer fronts, just one coat to start.
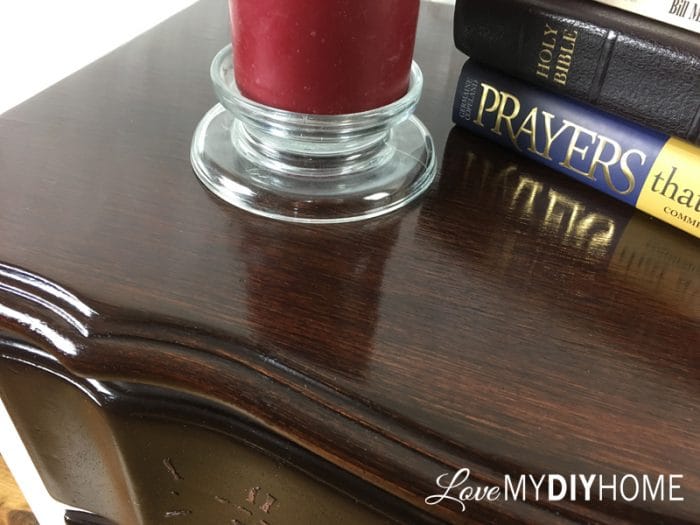
Raised Stenciling
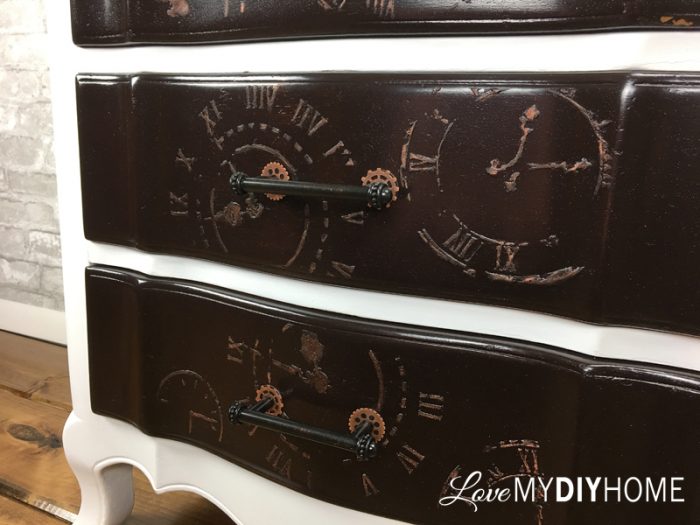
This was the perfect project to try out some raised stenciling. So I found my (afflink) Clock Stencil and varied my stenciling all over the drawers to add to the texture and add interest. It was a bit tedious because the drawers weren't flat like most. Stencil, wipe off the mess, stencil again, until I got what I wanted.

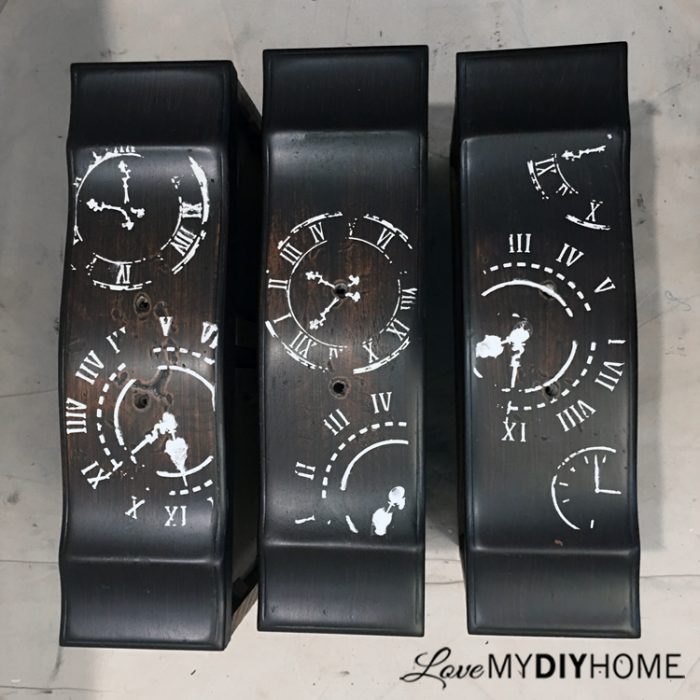
Staining/Topcoating
After it was completely dry, I stained again with (afflinks) Java Gel. I used General Finishes Wipe on Poly to topcoat it like I used on the top.
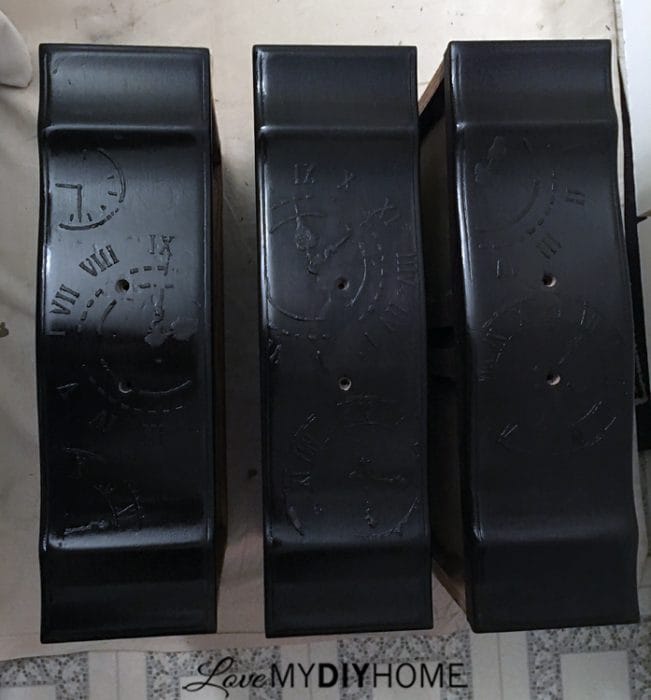
Gilding Wax
One Original Pull Was Broken
Derrick from DLawlessHardware.com sent me three pulls for the drawers, along with some matching ones for my dresser that's coming next. The holes were too big for the pulls since the pulls were fairly small in diameter where they meet the drawer front, and just a tad off in size. So I got creative. What could I do? I either had to fill in the holes, which would mean I would have to re-stain and topcoat, then drill new ones etc. or figure something else out. If I'd had the pulls before I had started the project, it would have been different. But I'm not one that likes to re-do or add steps if I don't have to.
Decorative Washers
I looked for decorative washers, but either they were too expensive, didn't fit or look right. So here comes the improvisation. I bought regular washers and findings and fortunately they came in the color I wanted, copper. Findings are used in mixed media and scrapbooking type projects. I've always wanted to create a mixed-media project. Here was my chance.
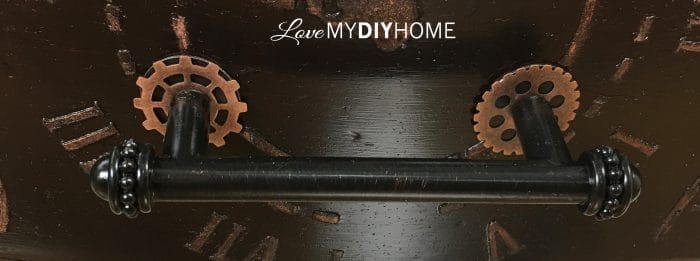
I spray painted the (afflinks) washers to match the Java Gel with Rustoleum Spray Paint and picked out findings to go on top for decoration, combining them for behind my pulls to hide the big hole and to create a steam punk look.


Adding the Hardware
When I went to add the pulls with the washers onto the drawers, I used two different styles of findings for a more varied look. Perfection was not my goal on this piece. Here you can see the pulls with the painted washers, copper findings and the copper accented raised stencils.
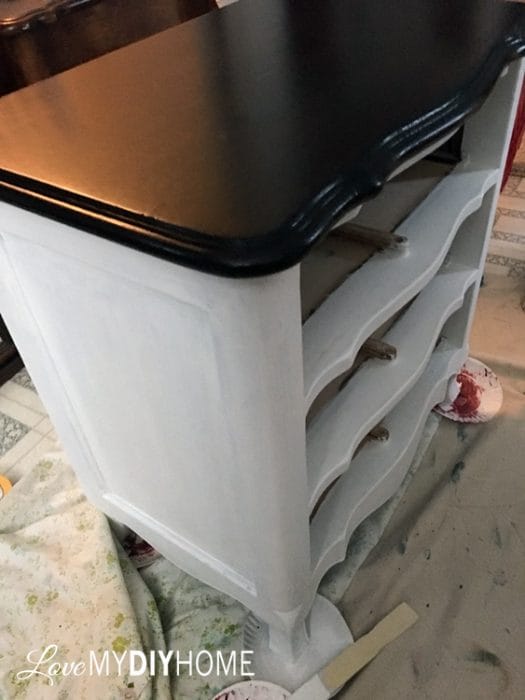
The Body Had to Coordinate My Nightstand.
Mine was bright white, so I incorporated that into this one. I wanted to try out a paint/primer acrylic paint that I had a $10 off coupon for, so this was a good chance to see if it would cover. It took 3 coats to get good coverage. I didn't use a topcoat over the acrylic paint.
Pulling it All Together
A mixed media nightstand isn't the norm, but when you get a chance to create for yourself, you have much more freedom to experiment and be more creative in your project - and all the while hiding it from your DH.
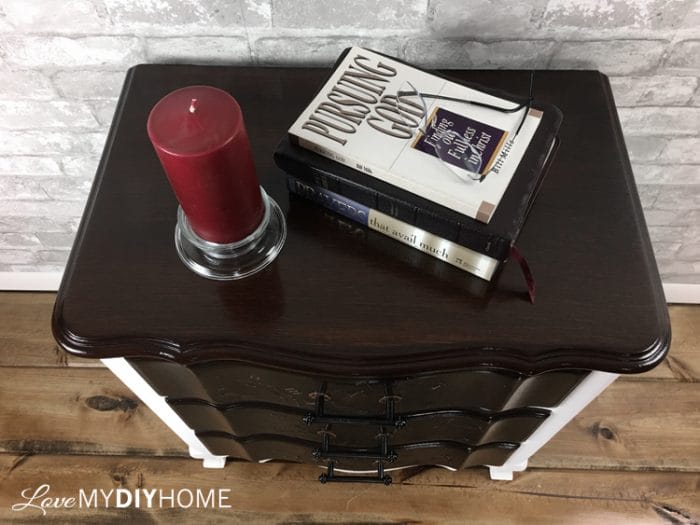

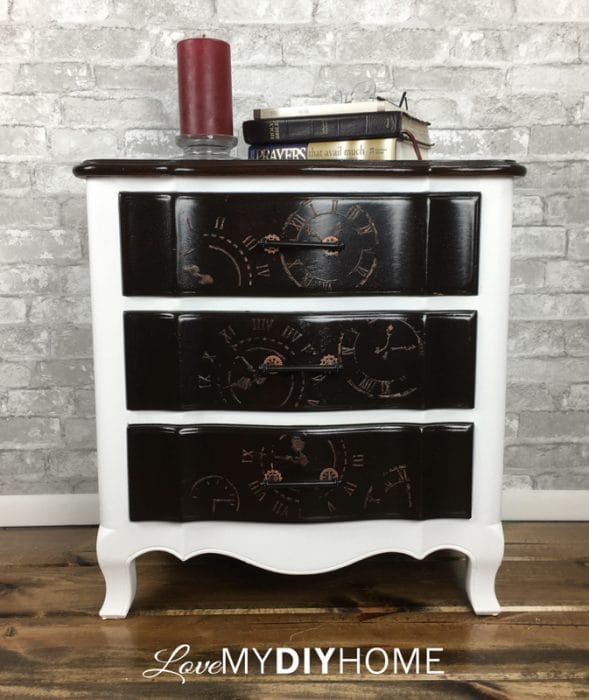

BEFORE

AFTER

Jillian and I did a little video for the Forum highlighting the techniques and products used in this nightstand.
I think that's about it. If you have any questions about any of this tutorial, ask in the comments below. Thanks for visiting and sharing in my gift giving this year - did you re-design anything for gifts this year?
OPPORTUNITIES
Do you want to learn how to redesign furniture? Check into my Furniture Flipping Blueprint. Enrollment is only open a few times a year, but you can get on the waiting list to be notified when it opens.
Furniture Flipping Forum on Facebook – We are 38,000+ members strong from over 100 countries. Come join us!
Talk soon!

* Disclosure: This post contains affiliate links. If you buy anything after clicking on one of the affiliate links, I receive a small commission of the sale. The cost to you is the same, and I only link to items that I think would benefit my readers. Your support of this blog is greatly appreciated! This post was sponsored by DLawless Hardware for supplying the pulls for this project – Thank you!

Val-that is really cool! Love it!
Thanks!
Love the nightstand but I’m interested in tir wall behind it. How did you diothat?