#sponsored post
It looked like an easy flip…
Have you ever had a DIY project that you just
wanted to throw out the window, chop it up with
an ax and then burn it to make sure it was
totally eradicated from your memory?
Beware of the “easy” ones…
There’s a little consignment shop about 45 minutes from us that we go to occasionally to look for furniture to flip. The prices are reasonable, usually, so it’s worth the trip. Of course visiting their other little shops and burger joint doesn’t hurt the experience either.
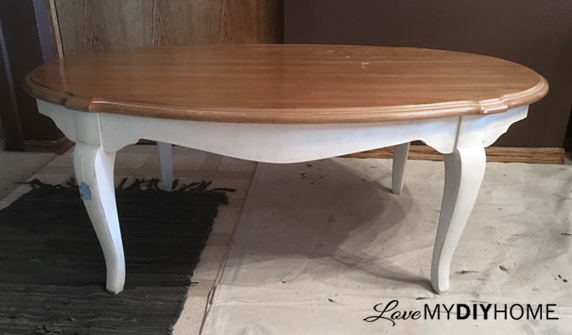
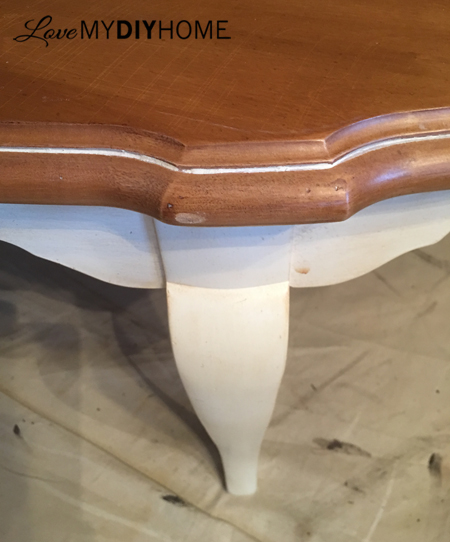
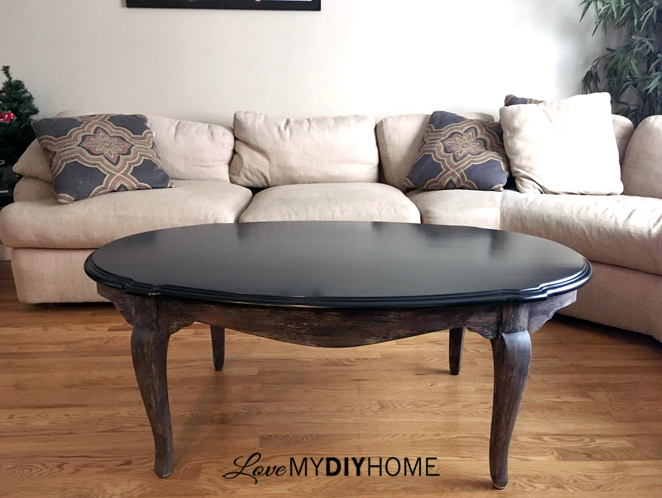
We found an Ethan Allen coffee table that looked like an easy flip, so we grabbed it and brought it home. (It’s the “EASY” ones you need to watch out for.)
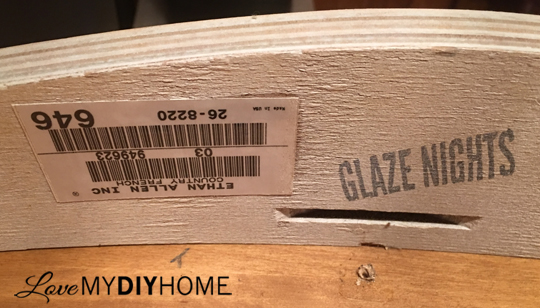
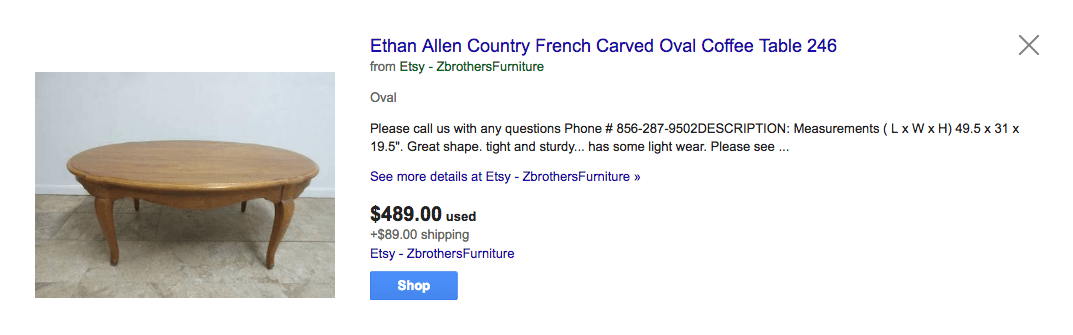
DH found one similar online at Etsy – ZBrothers Furniture, so I’m guessing the added white was either special order or just another version available:
From Fail to Finish in 12 Easy but Tedious Steps
STEP #1 – Sand in Prep
I hand sanded out some scratches on the top and planned to recoat it with (affiliate) Acriglaze Safecoat for protection, basically leaving the top as is. I sanded off most of the thin white trim paint but couldn’t get it all off. I didn’t want to have to strip it, so I changed my plan and decided to a gel stain it black with the “paint on” method.
STEP #2 – Deglosser Fail
I removed the top from the legs. Since I intended to paint the bottom part, I used deglosser to take off the shine so it would have tooth to receive the new paint. Everywhere I read, it said this would work, but I was skeptical. I’d used it before on another project, and it did great, but this was a factory finish, extra durable.
STEP #3 – Paint with OFMP
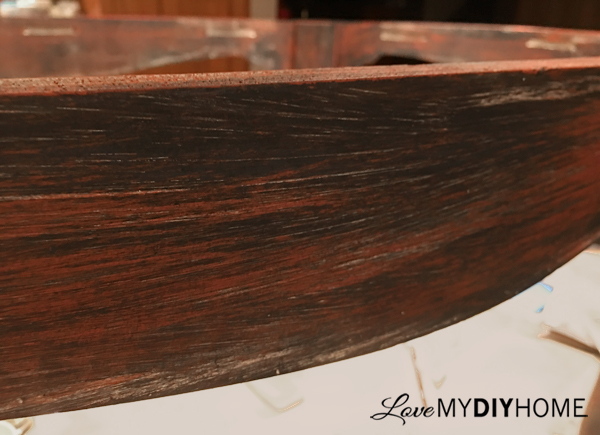
I wanted some of the white to peek through, so I painted (affiliate) Pitch Black Old Fashioned Milk Paint on the bottom part sparingly in an uneven fashion, not intending to cover the white completely. I was going for a weathered look. I added (affiliate) Extra Bond to the first coat of paint to help the paint stick.
To learn more about the Old Fashioned Milk Paint company watch Ann Thibeau’s interview with ABC.
STEP #4 – Dry Brush for a Weathered Look
Using a (affiliates) chip brush, I mixed up OFMP Salem Red,, dipped my brush in half way, and wiped most of it off onto a paper towel. Since the brush tips are of a shaggy sort, it gave me an uneven surface to drag the red across the black and white layers to give it a weathered look. It worked rather well.
This is a form of dry brushing.
STEP #5 – Change of Plan
When I tested how the paint adhered, the paint scratched right off even though I had used (affiliate) Extra Bond. Ugh. Best laid plans.
Always be willing to change your plans or re-do a step if needed – it’s all a part of the learning and growing process.
STEP #6 – Sand that Sucker
I had to re-sand the finish on the legs to better prep it. My DH sanded most of it, but then I decided to take off all the paint right down to the bare wood. I really didn’t want to chance the paint not bonding again. So I used my (affiliate) Ridgid orbital sander and really went at it. This was the “easy but tedious” part.
STEP #7 – Mission Accomplished… A Gorgeous Weathered Look
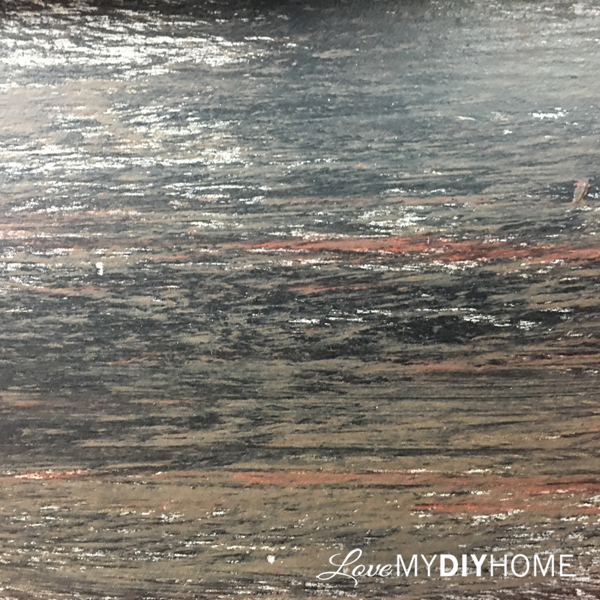
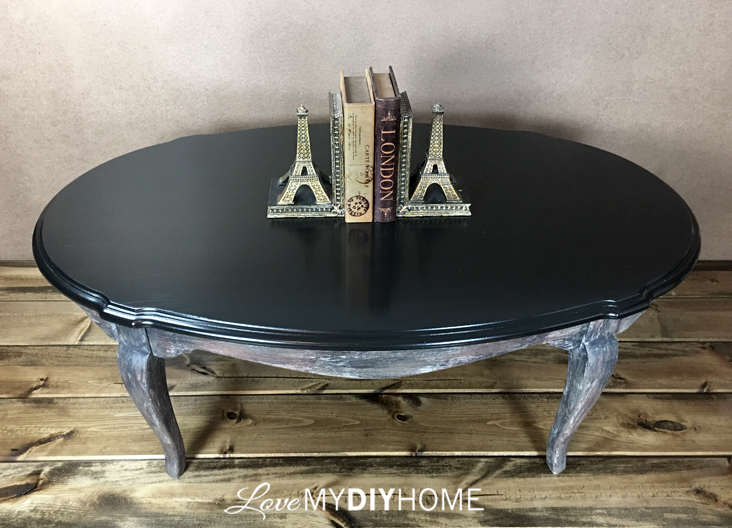
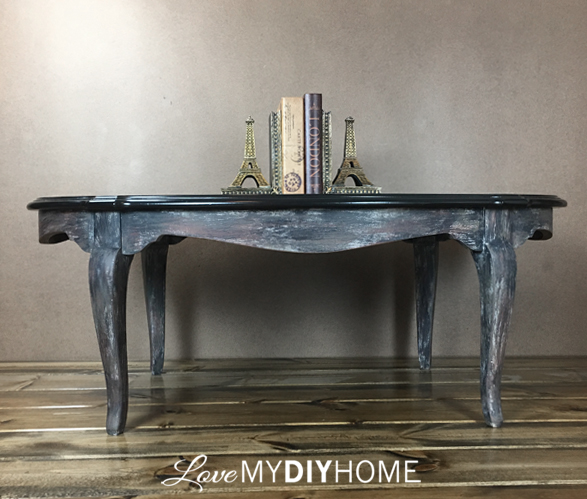
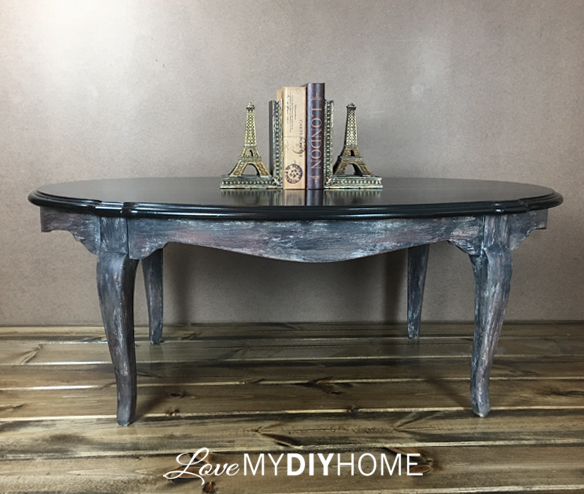
Fortunately I LOVE painting, so to repaint it was no biggie. I gave it a good layer of (affiliate links) Oyster White OFMP Safe Paint this time and also mixed in the Extra Bond 2 to 1. I wasn’t taking any chances. I reapplied the Pitch Black, and then dry brushed on a little Driftwood before the Salem Red. The results exceeded my expectations and I was on my way…it STUCK!
It is a good thing when your second attempt is so much better than your first.
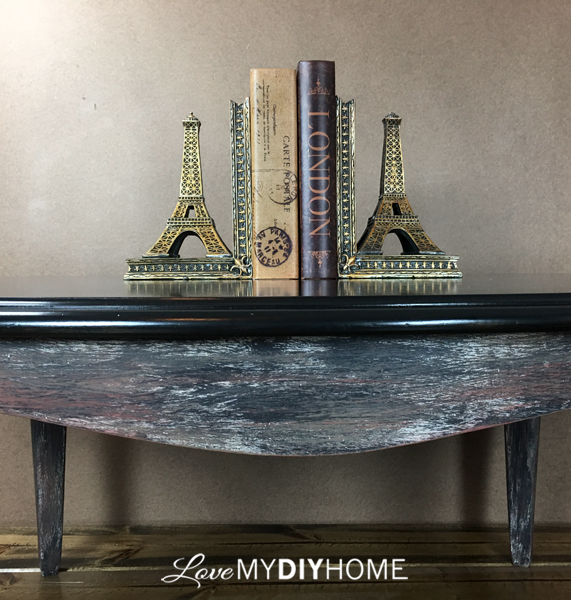
The white you see on the closeup below is the first coat of (affiliate links) OFMP Safe Paint with Extra Bond, Next, Pitch Black, Driftwood, and then finally the Salem Red as an accent.
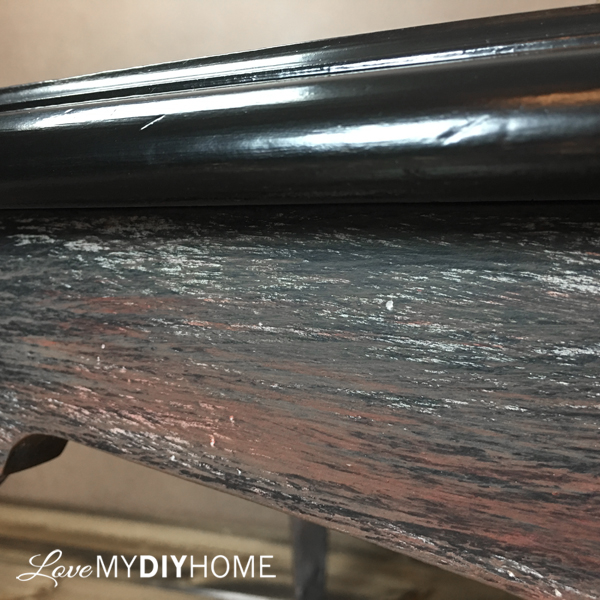
STEP #8 – Protect with Acriglaze Safecoat.
To protect the OFMP, I applied two coats of matte (affiliate) Acriglaze Safecoat. This is super easy to use; just brush it on.


BTW…I am an official OMFP Brand Blogger. The Old Fashioned Milk Paint Company sponsored my project by providing the paint (which I love, btw) and was expecting me to post my project on November 15.
Yeah. I totally missed that deadline, which is pretty unusual for me, the driven-over-achiever perfectionist who hates to disappoint people.
Fortunately Evie and Ann, my OFMP sponsors, being the kind and gracious people they are, allowed me to take my time and do this project right.
With the stubborn finish issues, Thanksgiving in-between, and then suffering through a 3+ week, knock me off my feet flu, my “easy” flip turned into a 40+ day project.
But that’s ok. When we fail, we learn. When we learn, we become better.
STEP #9 – Dealing with an Armor Plated Finish
Thanks to an online friend, I discovered the finish that Ethan Allen used on this coffee table was the problem and not my incompetance. Ha! At least it was not me – this time.
She told me that Ethan Allen usually uses sprayed Pre-Cat, or, “Pre-catalyzed” lacquer for a topcoat. It has a hardening agent added to make it extra durable, and to make furniture refinishers want to hide in a corner with a blanket over their heads. (I added that last part based on experience)
I picture them saying as they sprayed, “Take that, furniture flippers, muhahaha!”
So I sanded and sanded and then sanded again.
STEP #10 – Stain the Top
I gel stained the underside of the top first (I like to finish even the spots where no one looks, unlike most retail furniture suppliers) and when it was dry, I flipped it over and painted on 3 layers of the black gel stain and let it sit for a week. A bit of it rubbed off on the side when I put on my first layer of oil based topcoat with a rag (on the back to try it out), so I had to repair that area with more stain. I let it sit another couple of days and then flipped it to do the other side to do the top.
STEP #11 – Lightly Sand
Before topcoating, always do a light sand of 400 or more grit is in order to smooth out the surface and help adhesion.
STEP #12 – Apply 3-5 Coats of Finish
This time, to do the top, I used my HDX staining pad to apply the (affiliate) oil based satin finish. It assured less friction and an easy glide.
It went on like a breeze and looked like glass…until it dried. I had chosen (affiliate) Arm-R-Seal for its durability. I’m experimenting with different products for my membership site, so it was time to give this a try. Everywhere I read people were saying it was easy to use and provided a great protective finish.
I ran into a bit of a problem with the topcoat after it dried. I had streaks. It streaked whether I did a thick or thin coat. It streaked whether the room temp was 66 or 70.
Apparently it started setting up, or drying, within seconds before I got my second swipe in. Where it overlapped I was getting a different sheen. I suspect the humidity in my house was too low, thus the trouble with the overlapped areas. I was quick in the application, so I know it wasn’t my technique.
I ended up switching to another GF product, (affiliate) High Performance Top Coat in satin, or HPTC for short for the final coats.
STEP #12 – Name her “Katherine”
This coffee table is named Katherine after the main character in the “Taming of the Shrew.” She was obstinate and hard to tame, but once tempered became highly respected and valued.
We can take a difficult piece that others might pass by and remake it into something special.
Katherine was featured at the Red Shed Facebook store and sold within an hour of posting. Here is a picture of her in her new home:
We have a furniture flippers FB group that is great for questions and sharing of your furniture projects. We are now receiving new members, so just click join.
[Tweet “Have you ever had to re-do a project? The struggle is real, but it’s worth it.”]
Don’t give up.
Just don’t.
Blessings!
XXOO


Here are some of the products used on this project:
*Disclosure: The Old Fashioned Milk Paint Company supplied products for this project. All opinions are my own. This post also contains affiliate links. If you buy anything after clicking on one of the affiliate links, I receive a small commission of the sale. The cost to you is the same, and I only link to items that I think would benefit my readers. All links are in red for your convenience. Your support of this blog is greatly appreciated!
OOOOHHHH I know exactly what you mean about those "easy" projects! They never turn out to be easy! But in the end your table came out beautifully. 🙂
Thanks. This is one project that I’m so glad to be done with!
Love the transformation! It looks fabulous
Thanks, Renee!
I can hear your pain, Val. I thought it was only the wild me wanting to throw something out of the window but not I am relieved. Anyway, that table looks pretty and the finish on the table top is awesome.
Schedule
Thanks, Pili. We almost had had a bonfire…