
#sponsored
14 months ago I cleaned and sanded it. A few months ago I primed it. Just yesterday I finally got to painting it.
Go Bold or Go home, right?
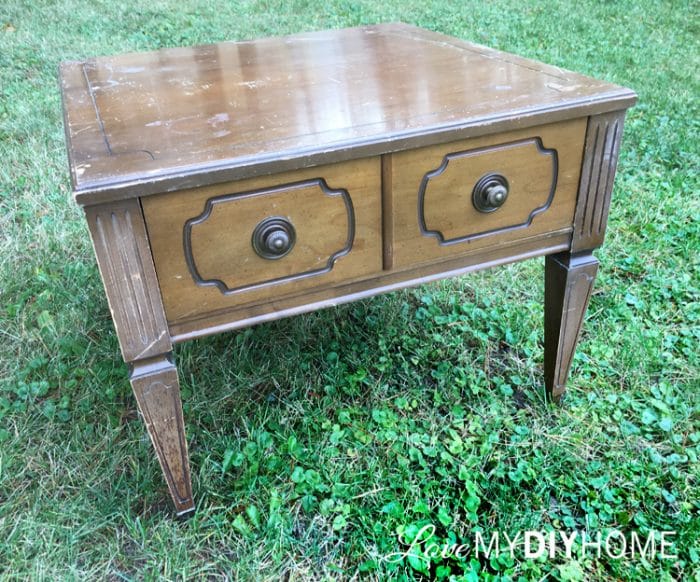
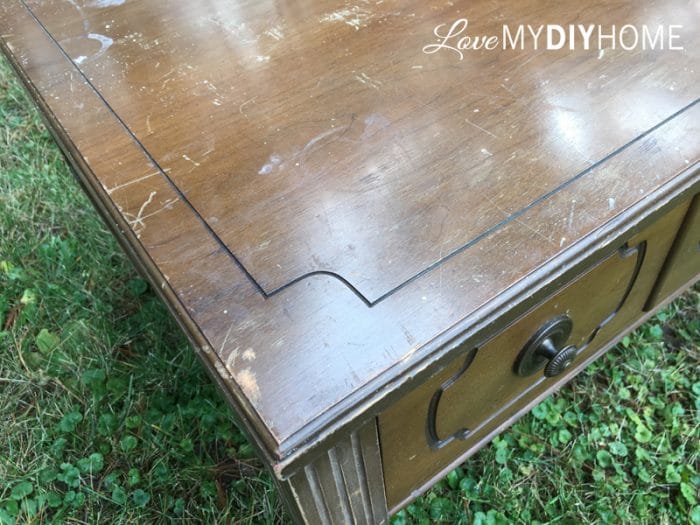
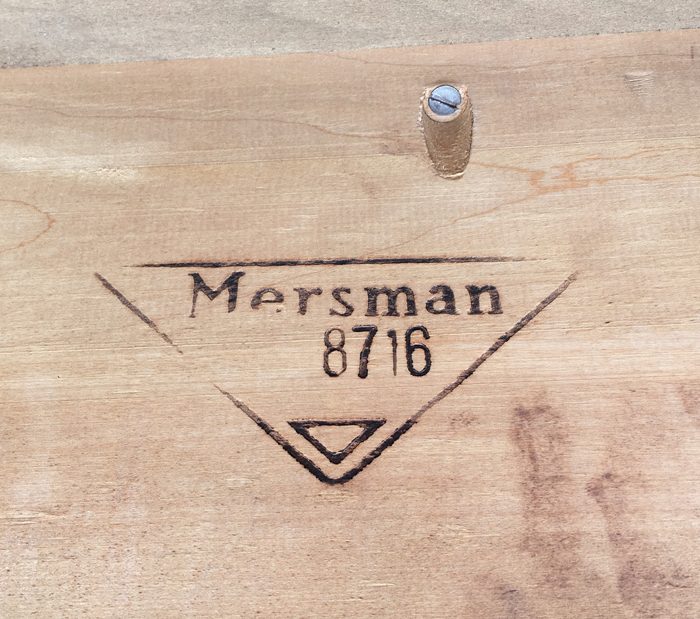
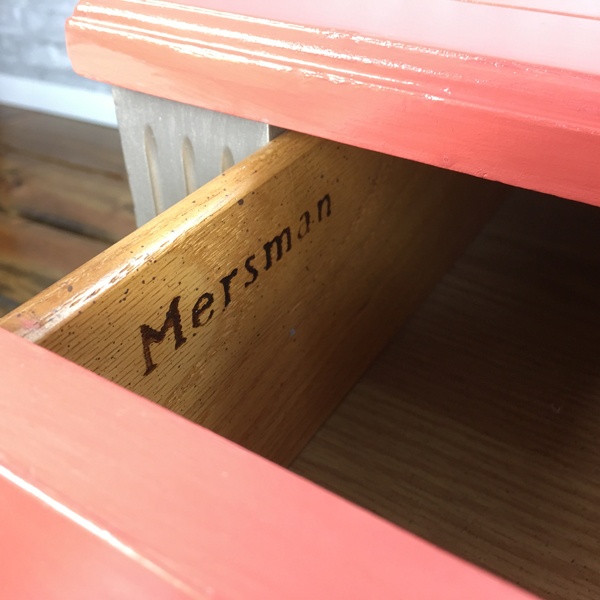
When researching this table, we could find nothing that placed it into the mid-century or mid-century modern category. Though Mersman tables are plenteous, there aren't any out there like this one. So who knows? Mid-Century...Mid-Century Modern? Vintage? Antique? Either way, it's old and not from this era. The store closed down in the mid 90s and produced more than their share of tables for around 100 years. If you know details, please share in the comments. So on with the show...
(Affiliate links are below in red for your convenience.)
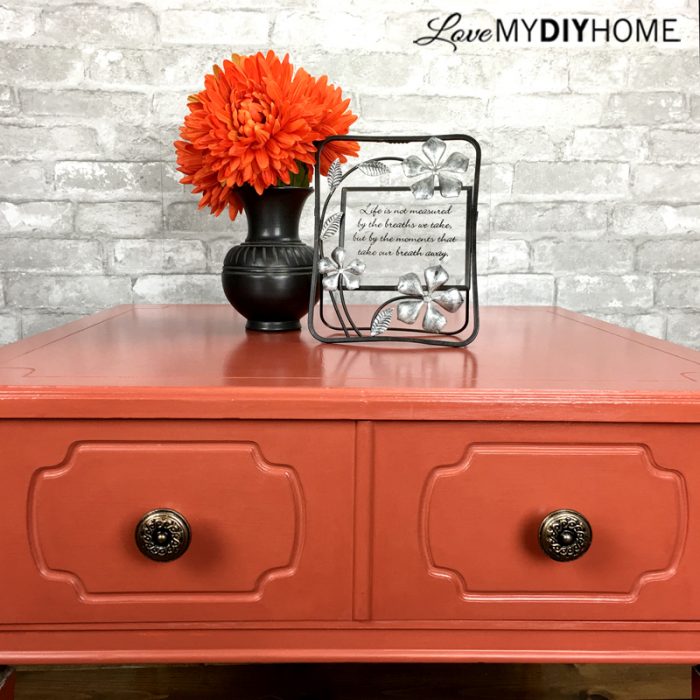
Knobs from Hobby Lobby
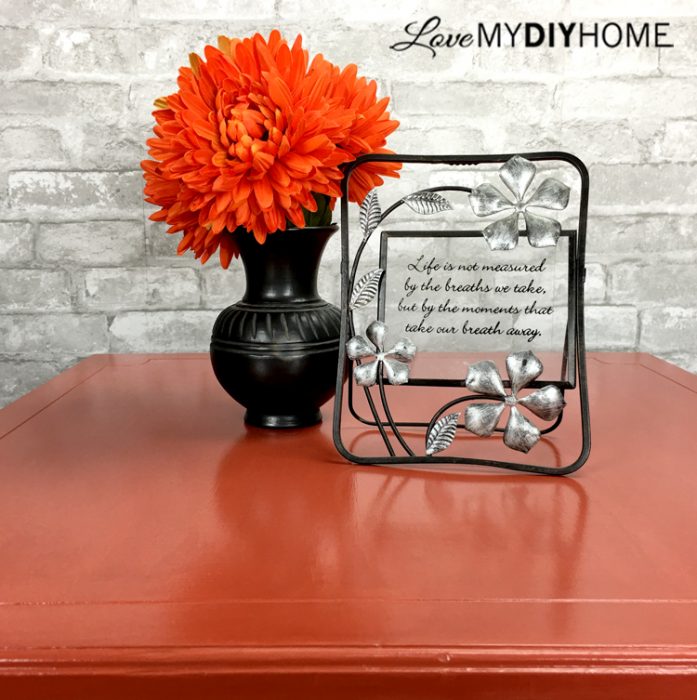
Every time I use Old Fashioned Milk Paint, I say to myself, "Self, I surely do love this stuff." It's such a smooth paint and covers well. The colors are vibrant, it doesn't go bad (comes in a powder form that you store in a glass jar), you can mix every color under the rainbo. It's so natural you feel like you are doing the world a service by using it. I used the safe paint in salmon, which is such a vibrant orange it's hard not to stand and stare at it after you get it on your piece.
STEP #1 PRIME with Zinsser 123
STEP #2 PAINT with OFMP

STEP #3 PAINT TRIM with Rustoleum Champagne Metallic

STEP #4 TOP COAT with CrystaLac
STEP #5 ADD METALLIC LUSTRE to HARDWARE

STEP #6 INSTALL HARDWARE
The (afflinks) CrystaLac company sent me two of their products to try out, so I used the water based gloss polyurethane over top the Old Fashioned MIlk Paint and metallic paint. I wasn't sure how they would mesh, so I tried it on the feet first and it looked great, so I kept going. I usually use a sponge, but when doing the details with a little brush, I grabbed my (afflink) Zibra angled brush because it was going on so well with my littler brush. It was a perfect tool to use with the polyurethane - it went on perfectly smooth.
BUT, I'm sure it was due to the dryness in my workshop. I've found that "self-leveling" doesn't work when there isn't enough humidity in the air. Putting a pot of water on the stove and having sufficient heat really does matter when you're going for a flawless finish. Sanding in-between coats helps too, but I found this poly to be very hard drying - which made it difficult to smooth it out once it dried, which by the way did so quickly. I switched to using a damp sponge and that helped to get a better finish.
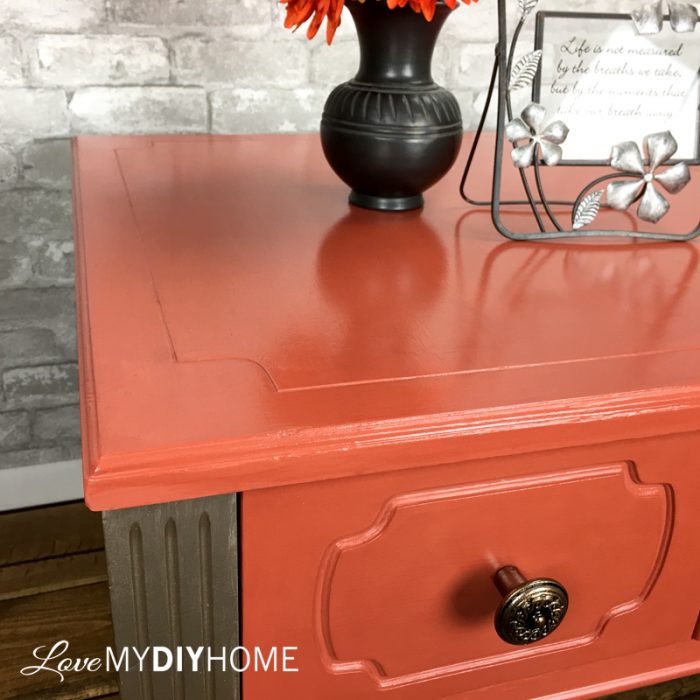

Topcoating over metallic can dull the shine, but using this gloss polyurethane only made it more glitzy - so there was a win in the glitz category.


To be honest, I'm not really into MCM
MCM to me is just reminiscent of my mom's old furniture. The appeal isn't there to me because I grew up seeing it everywhere - unlike today's younger generation who sees it as retro, and a "cool" change from the oak wood furniture of my generation they saw everywhere. To be fair, I'm very tired of the oak everywhere look too. So I saw this as a welcome change to a very outdated, ugly piece that was a road side piece of junk. The Mersman brand apparently is a big seller.
BUT I do love this piece - it's so vibrant and fun to look at.
To make my point, let's revisit, and you tell me...
BEFORE
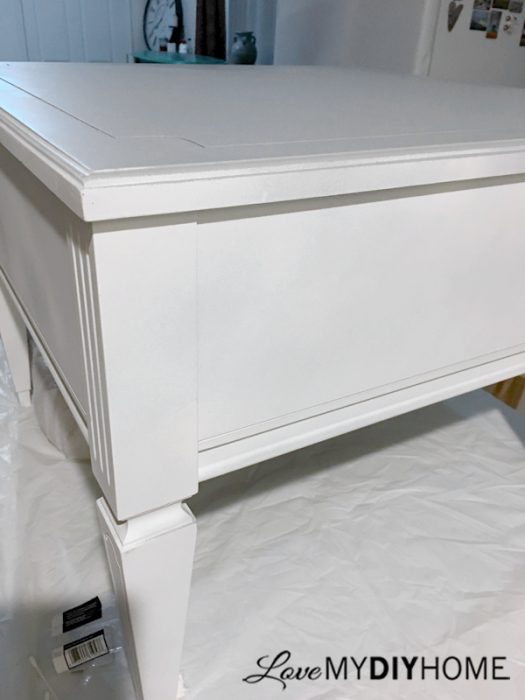
AFTER
What do you think? Was it an improvement over the original?
Did I do good? Old Fashioned Milk Paint is a winner when it comes to artistic expression. You start with warm to hot water in a cup and mix in the powdered paint until you get the consistency you like. I use either a fork, a whisk, submersible blender, or a popsicle stick to mix. It's typically 50/50 water/paint, but I lean toward a little thicker than that. The magical part is that when you paint, you get a varied look. You get a uneven color variation that is amazing, especially if you mix together several colors to make your own unique paint color. The colors reflect differently based on the lighting of the day and your angle.
So, what are you working on right now? Are you flipping? Are you making a gift for Christmas? Are you painting?


* Disclosure: This post contains affiliate links. If you buy anything after clicking on one of the affiliate links, I receive a small commission of the sale. The cost to you is the same, and I only link to items that I think would benefit my readers. Your support of this blog is greatly appreciated! This post was sponsored by Old Fashioned Milk Paint and CrystaLac by supplying some of the materials for this project – Thank you!
I agree with you about MCM but you turned this roadside trash into a beautiful treasure.
Thanks, Debra. It surely WAS ugly!
Nice choice of salmon and metallic to turn this into such a cheery piece! Great work!
Thanks, Catherine. I had contemplated gold, but went with the champagne bc it was just the right contrast.
Hi i just found the same table please notify me if you have found any information on the table please and it came out real beautiful thank you
Mine is a Mersman.
looks amazing.
is the iced espresso metallic lustre close to oil rubbed bronze?
Yes, it’s just more glitzy.
That piece came out beautiful. I know this was posted a while ago but I just came across the same exact table at a Goodwill for eight dollars. It had been painted red with gold trim. I plan on using a cream colored chalk paint and some brown wax to seal. We shall see how this turns out
Thanks, it was a fun project! I’d like to see yours when you get it finished.