“Spray it Pretty”
#sponsored post
This month The Fab Furniture Flippin’ Contest®, “Spray it Pretty” is sponsored by (aff link) HomeRight. They sent us all a Finish Max sprayer to complete our projects, something I’ve been hearing a lot about from other furniture flippers, so I was glad to give it a try.
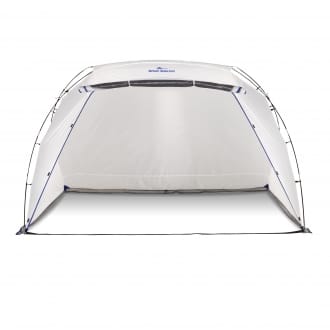
Along with the sprayer gift, HomeRight is giving prizes to one winner – one being this (aff links) spray shelter.  We bought “Ellie” at an estate sale – the same one where we got the Ethan Allen China Cabinet that I turned into a buffet a few months ago.
 She was one of the last pieces remaining at the estate sale on the last day. I hadn’t even noticed her the two times I had looked through the sale and only saw her when we were finished loading all of our purchases into our truck.
She was an after thought. I asked my DH to grab her on a whim. As always, he agreed and added her to our truckload. She was a boring outdated piece, but I saw she was in excellent shape and on rollers, which was unusual.
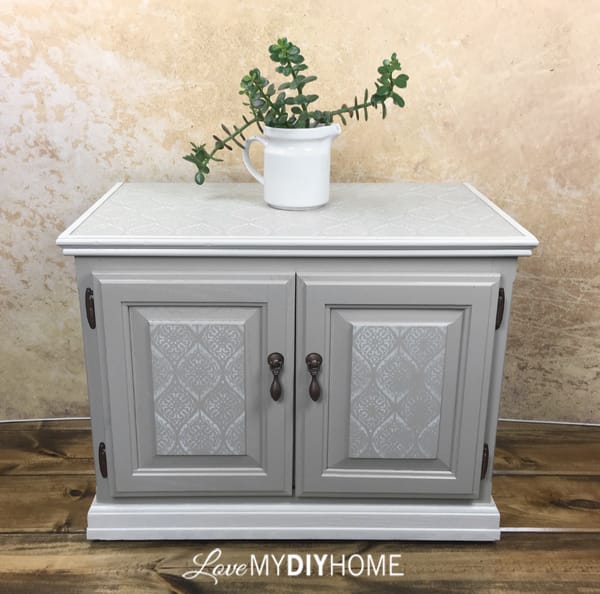
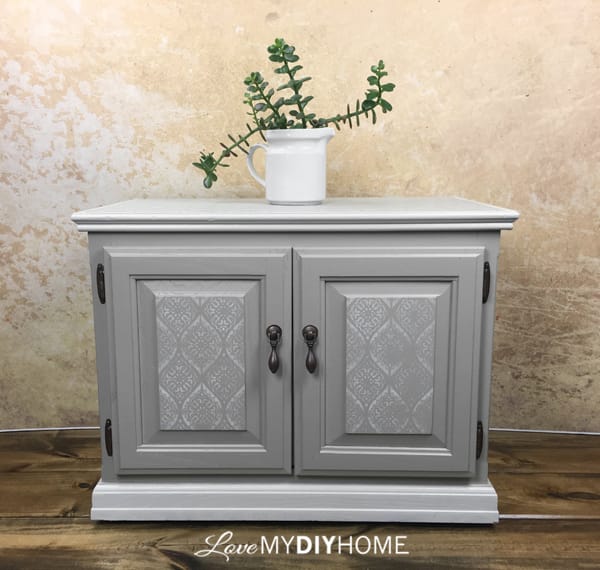
Her transformation was quite amazing – no matter how many pieces I refinish, I’m always in awe each time when I stand back and look at the finished product. See for yourself…
Her Story:
Starting out with a ho-hum unwanted rolling cabinet, the typical prep was required. Always prep. Always. Instead of sanding as usual, I used a deglosser to remove the shine and allow my paint to adhere.
My Step by Step Process:
1. Disassemble the cabinet, clean and degloss. Bag and label the hardware.
2. Spray on three thin coats of Benjamin Moore Advance “Pashmina” using the (aff link) Finish Max Sprayer – one coat a day for three days. I started with the cabinet upside-down and then flipped it after I got that part covered. After about a half an hour of sitting, I went out to check for any paint drips that may have developed after a few minutes. This was my first spray project (on furniture), so I experimented with the paint flow and my spray technique.
TIPS: Spray light coats and don’t go over and over it. You will be tempted to, but don’t do it. Anything you miss can be caught on the next coat. Drips develop because we enjoy the process too much and back track, spraying too much in one sitting! Also, spray past the piece and then move down to your next pass while off the piece so your paint doesn’t pool on the edges. Move your arm as you spray, not just your wrist, for a more even coat.
The Finish Max comes with a viscosity cup to measure the thickness of your paint. If it drains out of the cup between 30 and 40 seconds, you are good to go. Otherwise, just thin with water. I didn’t measure, I just added water and tested it until I liked the consistency. My goal was 35 seconds.
Once it is the right consistency, just dump the paint into the paint container, plug it in and spray. Super easy. Just make sure you practice a bit before spraying your piece.
HomeRight Sprayer Furniture Flip – Ellie Rolling Side Table from Val Frania on Vimeo.
This was my first time using Benjamin Moore Advance. I typically use a chalk or milk paint, but I wanted to see how this enamel worked with the Finish Max. It was amazing.
I will be trying out chalk and milk paint in the future and let you know how it does. The BM Advance went on smooth and dried flawlessly. I used three coats because the wood grain was quite deep and I prefer to do thinner coats. The Finish Max allows you to adjust the paint flow as well as the spray pattern.
I played around with it, trying out different spray patterns and angles on a big cardboard box out in my new handy dandy spray room in the garage. Since we’re in Wisconsin, I had to warm up the garage first with our portable kerosene heater. Once warm, I turned it off and sprayed letting it dry overnight.
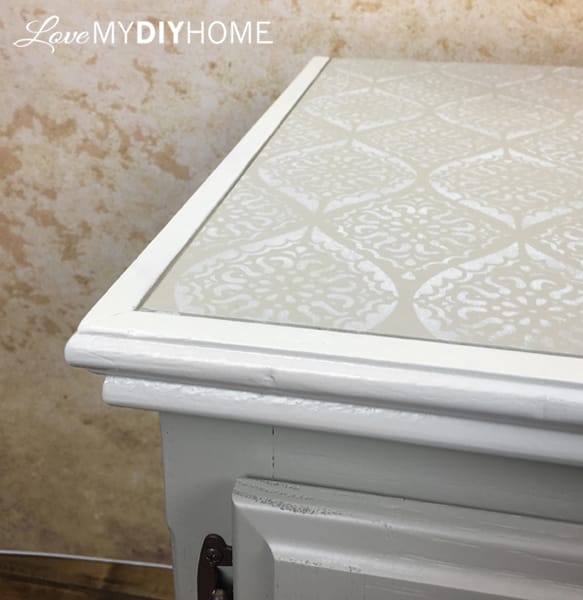
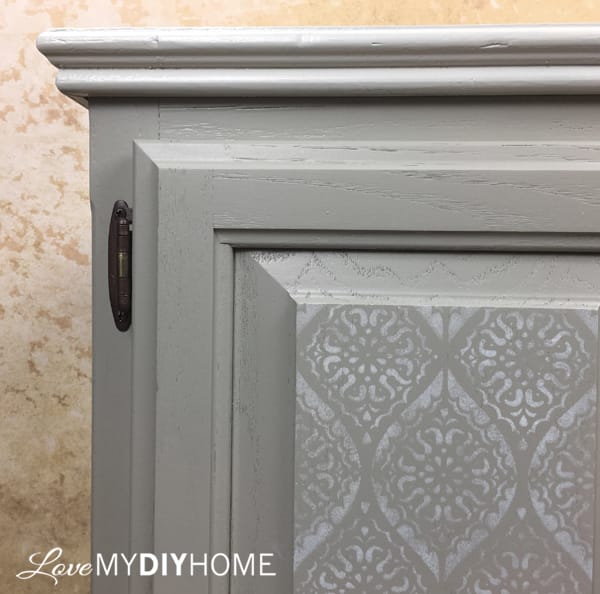
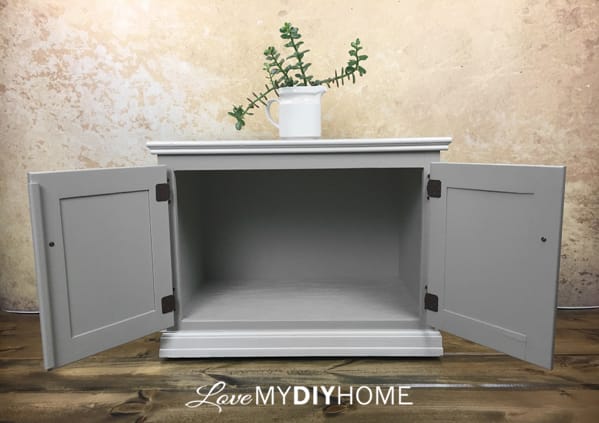
3. Paint the trim on the body the lighter shade, “Sonnet” by Benjamin Moore Advance.
A couple of light coats on top of the darker tan was sufficient. It went on smoothly and self leveled – no brush strokes and the grain pattern still showed through (which was my hope).
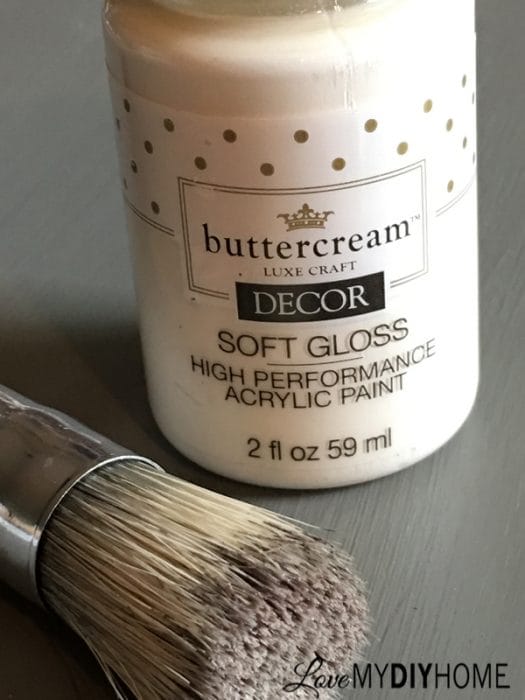
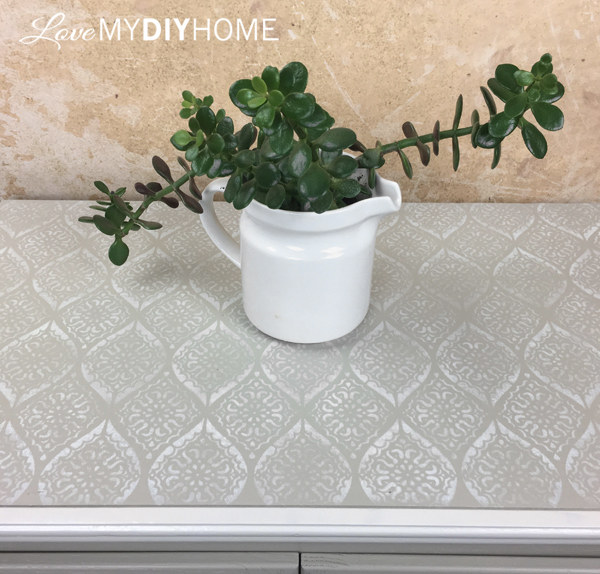
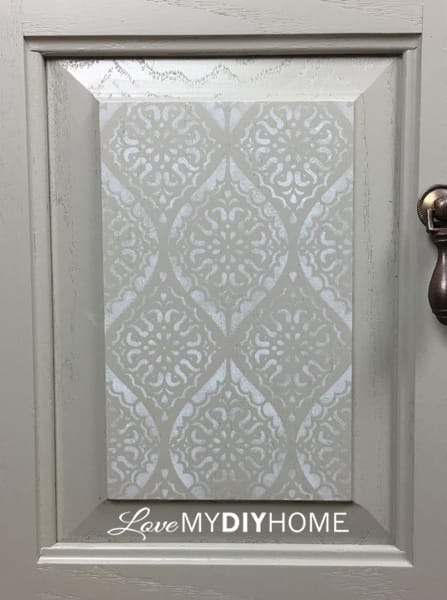
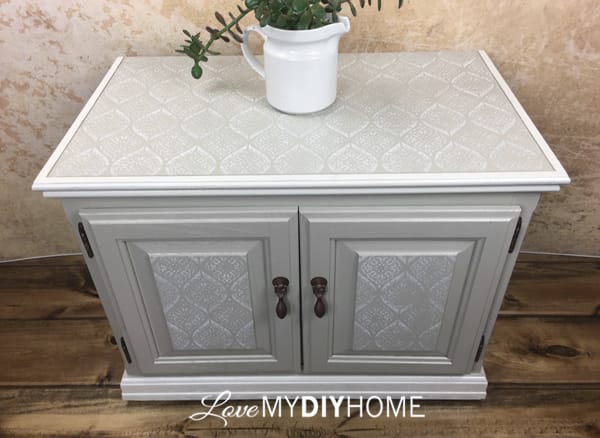
4. Stencil the top and doors with a repeating design with acrylic stencil paint the same color as the trim.
I used Buttercream Luxe Craft acrylic paint in the color “bisque” and a 12 x 12 stencil with repeating pattern. They were clearanced at JoAnns a few months ago. The stencil brush is one I used many years ago when teddy bears and hearts were all the rage.
Fortunately the stencil had the pattern drawn on the edges that would allow me to line up the pattern easily. To give a more worn appearance, use a light hand while stenciling and purposely leave an uneven pattern, paying special attention to the edges – fade them out.
TIP: Don’t over brush because it dries fast and will not dry smoothly if you drag your brush over it when it’s set up – brush it on, leave it and if you miss anything, hit it with your next coat. I usually do the satin first and then flat out flat on the next couple of coats for durability, but this cabinet only needed it to protect the stenciled areas. I used the flat out flat to contrast the satin finish of the Benjamin Moore paint. If you want to increase open time, add some GF Extender. Oh, and unlike me, make sure you wash out your brush before you go to bed…
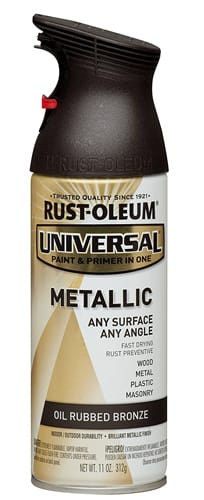
 6. Clean and rough up hardware with sand paper. Paint with (aff link) Rustoleum Metallic spray paint three light coats, one every thirty minutes (according to the can’s instructions).
 TIP: When spraying movable hardware pieces like hinges, before spraying another coat, move the piece so the hinges and other moving parts don’t seal shut or stick.
Watch DH spray my hardware – I was glad he did the first coat because for some reason the paint dripped down the nozzle to his hands. I wore gloves for the next two coats. Better him than me! VBG
Spraying Hardware is Easy from Val Frania on Vimeo.
8. Next day repeat on the backside of hardware.
TIP: Pop the screws into a piece of corrugated cardboard so they stand up for painting. As you do more coats on the second side, be sure not to lay the side that is already done on top of the over spray – it will mess it up. Don’t ask how I know this…
9. Reassemble the cabinet and stand back and marvel – this is your work and it’s amazing!
10. Plan to list the cabinet for sale all the while knowing you hope it doesn’t sell because it goes so well in your guest room.
This piece earned the name “Ellie” which means “bright shining one” because it came from dull and boring to a shining example of how a piece of furniture can be made new again.
Thanks for joining me in another furniture flip tutorial. The HomeRight made the job so easy and won me over.
Face palm…why did I wait so long to spray my furniture?
Thank you, (aff link) HomeRight, for the opportunity. Until next time…
Sponsorship Disclosure Some or all of the hosts of The Fab Furniture Flippin’ Contest® receive monetary and/or product compensation from the sponsoring brand, HomeRight, in order to complete their themed projects. HomeRight will also provide the prize package for the contest winner.
More info from the company: (aff link) The Finish Max sprayer can be used with paint, chalk paint, clear sealer, polyurethane, primer, stain or varnish. The sprayer is easy to set up, easy to use and easy to clean-up and is backed by a two-year warranty. This HVLP (high volume, low pressure) sprayer will direct the finish on your project and has less over spray than airless sprayer models. * Disclosure: This post contains affiliate links. If you buy anything after clicking on one of the affiliate links, I receive a small commission of the sale. The cost to you is the same, and I only link to items that I think would benefit my readers. This ebook was given to me in exchange for an honest review. Your support of this blog is greatly appreciated!

Save

 We bought “Ellie” at an estate sale – the same one where we got the Ethan Allen China Cabinet that I turned into a buffet a few months ago.


 5. Topcoat just the stenciled areas with (aff link) General Finishes Flat Out Flat using a quality brush to bring a soft appearance.
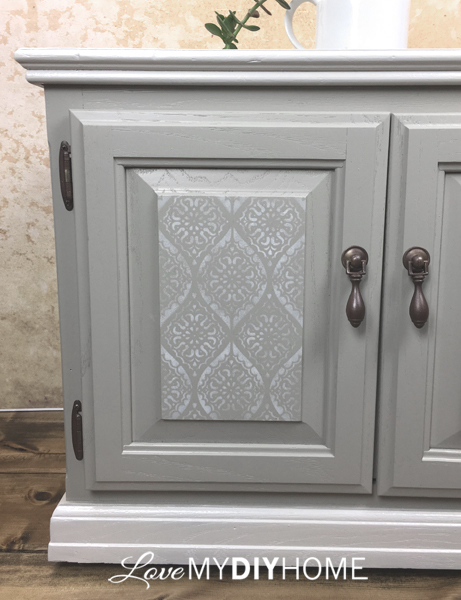
 6. Clean and rough up hardware with sand paper. Paint with (aff link) Rustoleum Metallic spray paint three light coats, one every thirty minutes (according to the can’s instructions).
 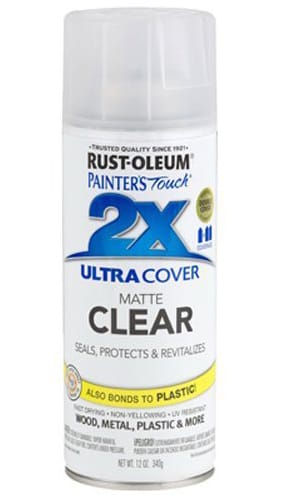 7. Thirty minutes after the last coat on the hardware, spray one coat of (aff link) Rustoleum clear spray, matte.
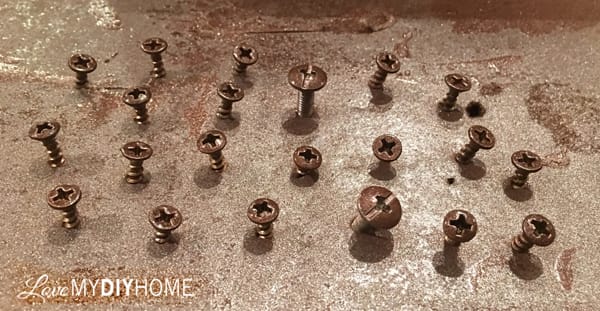


Looks fantastic! Love the step by step.
Thanks, Mary Claire!
Val! You are wonderful! So thorough! I love how you explained your step by step process! The piece came out totally transformed and gorgeous. Love all the details! Well done!
Thanks, Stefanie! Is it bad that I hope it doesn’t sell? Hehe I fall in love with every piece. Thanks for visiting!