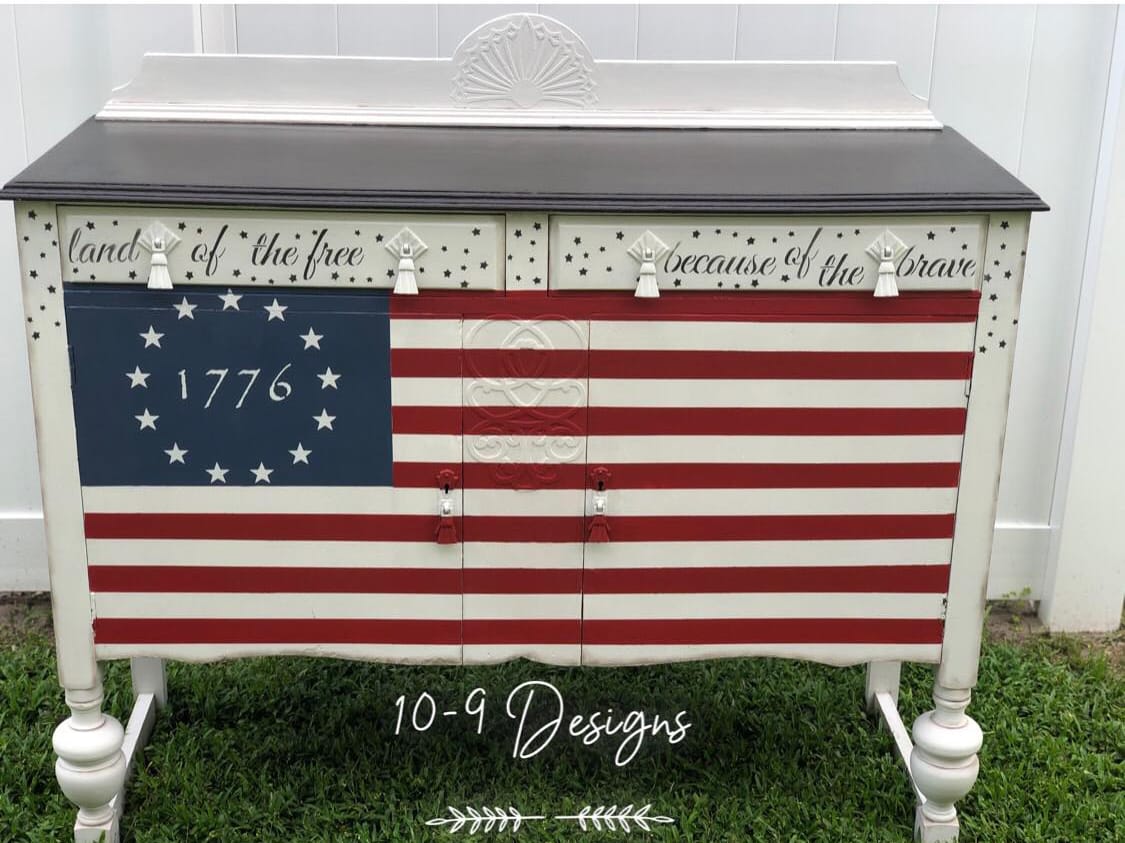
Jewelry Armoire Updated {Love My DIY Home}

Jewelry Armoire Update – OFMP & Modern Masters to the Rescue!

Mom’s Jewelry Armoire I’ve had my mom’s jewelry armoire since she passed nearly 3 years ago in my walk-in closet, holding all of my essential oils and all the accessories. Yes, I have that many. What can I say. I love my oils! It needed a change and I wanted to play with some of the many options we have these days for updating our furniture. So out came the Old Fashioned Milk Paint and an IOD Transfer. Here is the before – Meet Nancy (before she was beautiful) I named her Nancy after my fave aunt and she was the first one I called to let the sisters know my mom had gone on to Glory. I’ll think of the both of them when I see it. Sentimental? Yes. Supply List (Affiliate Links are in bold Salmon throughout this post for your convenience) Old Fashioned Milk Safe Paint Salmon … Read more

Red Chair Flip {Love My DIY Home)

Oh, Susanna, don’t you cry for me…

#sponsored post   Susanna, a Royal Settee Another estate sale – another opportunity to save an old piece of unwanted furniture. This time it was for my granddaughters. I could see my little two-year-old grand daughters sitting in this little chair holding the teddy bear that used to belong to their moms the second I found Susanna. Here she is “before” at the estate sale Before I took her home Before she changed Before she became mine Susanna, “BEFORE”       Tired, worn and hoping to serve again… These outdated and worn out pieces of furniture can have another 100 years if we bring the back to life. Most pass them by. Most don’t even see them. The estate buyers typically look for the big antiquey pieces that make a statement. Little Susanna just sat there as everyone walked right by, unseen. It was the same for Paige. She … Read more

Should We Paint Antiques?

It’s time to address the issue. It’s 2017 and there is this common thread running through social media: “NO! Don’t paint that! It’s an antique. You will ruin it!” OR, “Nobody wants antiques any more. Paint it, make it beautiful again.” Who is right? Let’s look for a minute at a little bit of history, specifically, Colonial America… At 6:30 this morning, I woke up and said, “Hey, Siri. What time is it?” The lovely British accent came back at me and said, “It’s 6:31, way too early.” As per usual I grabbed my phone to check my messages on the Forum to see if there were any fires to put out and saw a screenshot from my DH about another debate going on regarding antiques. Oh, boy. Here we go again. One day I’ll tell you about a convo I had to deal with when my DH and I … Read more

10 Steps to Revive an Old Nightstand

They Are Everywhere You’ve seen them. Junky pieces of furniture that no one wants. They are priced for pennies compared to the new pieces you find in retail stores. Do you pass them by? “Jillian” The Nightstand She was ugly. She was dirty. She was smelly and sitting in a garage stuffed with junk. All she needed was someone to take her home. For those of you who know our DD, Jillian, this piece was named after her because we were together when we found her, and we painted this one together…not because they looked or smelled similar. VBG Supplies (Affiliate Links for Your Convenience) Krud Kutter Zinsser’s Spray Primer Rustoleum 2x Painter’s Touch spray paint Chalk Paint® by Annie Sloan Polyvine Dead Flat Wax Varnish 3M Sanding Sponge Her Steps Toward Beauty 1. Clean her up – she needed a good scrubbing. We sat her outside to air out … Read more

Accent Table Turns a New Paige – Pure and Original Fresco Lime Paint

#Sponsored Post They all were just passing her by… We named her “Paige”. Here she is in her original home before she became mine. She was one of many at an estate sale: Paige was pretty scratched up and worn out, but she had good bones. We snatched her up and packed her in with all the other pieces we found that day and took her home. She was an after thought. Why not? She had potential. After flipping her over, we could tell she had been handcrafted by the pencil marks that were still visible. Materials List (Affiliate Links) Soy Gel Metal Putty Knife Wallprim Fresco Lime Paint Rigid Hand Sander HomeRight Finish Max Sprayer Dead Flat Eco Sealer Java Gel Wipe On Poly FolkArt Mandalla Stencil Since we had just started using (afflink) Soy Gel to strip some pieces, my DH threw her in the mix. Strip off … Read more

Serving Cart Goes Fresco – A Lime Paint Transformation

#sponsored An Uncommon Surprise I know I say this a lot – so forgive my repetitiveness, but this transformation snuck up and surprised me more than I could have ever expected. (afflinks) Pure and Original offered to let me try out their Fresco lime paint on a piece of furniture. Typically one would use the Fresco Lime Paint on walls, but I wanted to try it on my furniture. BEFORE This serving cart sat in my house, slowly becoming outdated over the years – as have many pieces in my home and probably yours too. Before and After At one time this was modern and trendy. But no more. When I look at it now, I just see “old & boring”. Normally I’d not show the “after” so soon but I just couldn’t resist. This one threw me for a loop. The (afflink) lime paint finish is extraordinary. AFTER Here … Read more

Refinished End Tables Pair Up to Become Cora & Nora

#sponsored Estate sales are a great way to find matched sets. Twin end tables are rare and are highly sought after in the furniture rehab world. We found Cora & Nora, along with their matching coffee table, last summer at an estate sale in Stevens Point. The finish was “OK” but I like my furniture to be more than “OK”. “OK” is good enough for boring people. True that? So how do we “un-boring” it? Stuck on the Old-World Look. You could call it shabby chic, distressed, farmstyle, etc. but basically the “imperfect” has become the new “perfect.” Smooth, consistent, and coordinating have been replaced with chipped, shaded and contrasting. It is what it is, and most like it. There’s something about the worn, aged look that is appealing and millions around the world are in agreement. The Process and The Fail I first planned to use a new product, … Read more

Studio Art Rack {Love My DIY Home}

Bakers Rack Repurposed as Paint Studio Storage

Sometimes You Don’t Want to Paint Did I just say that out loud? Most of the time we look for projects to paint but occasionally we decide to keep it as is, just spiff it up a bit by adding detail or simply cleaning it up. We found this bakers rack on a weekend getaway to Door County at a sweet little consignment shop for just $35. It may have been an impulse buy, but it was one of the best so far. I Dragged it Out of Our Barn to Paint it for My New Studio I decided I liked it as is and cleaned it with water, a scrubbie and (afflinks) Krud Kutter. Sometimes Krud Kutter works better than you want and it took off a bit of the grunge that I thought was part of its charm, mainly, the water ring. BUT, sometimes a snafu can lead … Read more

Coffee Table Update OFMP {Love My DIY Home}

Coffee Table Comes Alive – An OFMP Update

Since I wanted to try out the two OFMP greens, Lexington and Tavern, layering seemed the best way to go. The first layer was Lexington. I added Extra Bond after a bit of research, since stain came off onto my sponge when I was cleaning in preparation for painting and I didn’t want to use shellac. The supposition is that the Extra Bond would seal in the stain if I mixed it into my first layer of OFMP. It covered well with not a hint on the dark stain bleeding through. So far so good.

It’s About TIME – The Skinny on a Little Side Table

Last week when I tried out the (aff link) HomeRight Finish Max on a rolling storage cabinet, I threw in a little skinny side table. Two for the price of one, so to speak. It was green, then dark brown, and now it’s a light tan, with decorative stenciling. It’s a bore no more. Super easy, 1,2,3,4 1. Spray one coat with Benjamin Moore Advance using a (aff link) HomeRight Finish Max. I only did one coat for easy distressing. 2. Distress, lightly. 3. (aff link) Stencil clocks and some French script. Get some paint in your brush and wipe most of it away on a paper towel or paper plate. I use acrylic paint. This is a dry brushing technique. Tape your stencil in place and do a quick up and down movement with the brush to get the paint onto your surface without it bleeding under. It’s easier … Read more

Love My DIY Home