
I found this pot out in my mom's a storage shed covered in dirt.
It had sat in there many years and traveled here to Wisconsin from Michigan a few years ago unprotected in that little plastic shed.
Here's that little pot - it's amazing the treasures you find sitting in a little plastic shed covered in dirt.

Since Michaels had fall silk flowers at 80% off yesterday, I bought a bunch for that little pot along with a little ceramic pumpkin I bought from a consignment shop for $2.00.

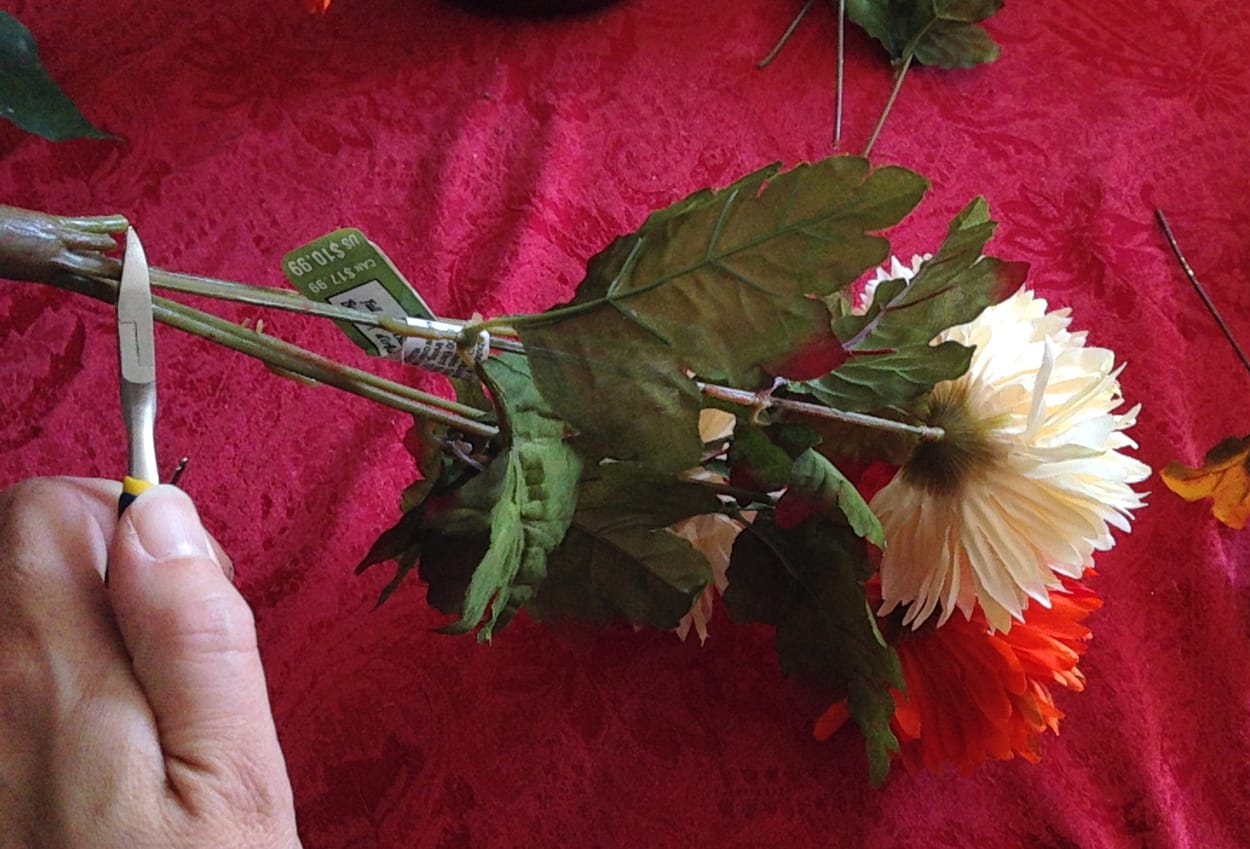
I started with flowers, two pots, some foam and a few picks. The only tool I used was a pair of tin snips that I used to cut the stems.

I stuck one of the smaller flower bushes in the center of the foam and spread them out. Normally you would just cut them apart and arrange them, but I thought this might give the arrangement a bit more stability.
This is the first time I've done an arrangement like this, so I was learning as I went along - I tend to fly by the seat of my pants when it comes to projects like this - totally NOT one of my personality traits. But I AM impatient when it comes to putting something together that I want N.O.W.
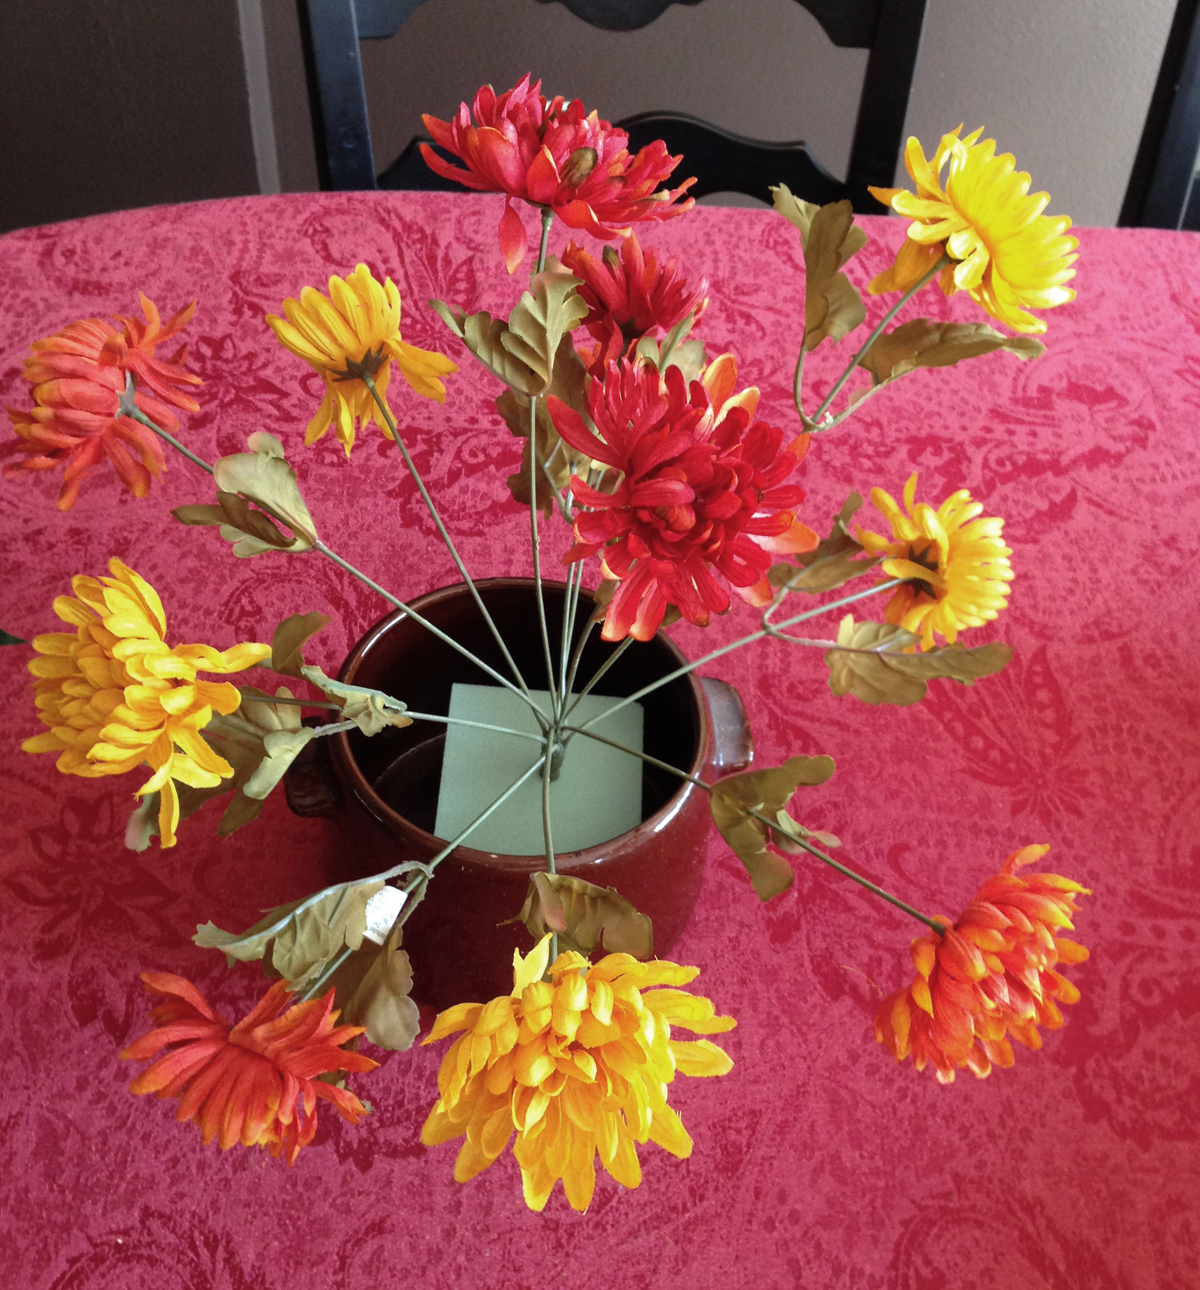
I added some larger flowers to give it some fullness.
These flowers also came in bunches, or bushes, so I cut them apart before arranging them in the pot.
Placing the flowers around in random order gave it a natural look.


Now it's starting to take shape!
At this point I'm rather amazed at how good it's beginning to look.

A couple of the flower stems were minus their flowers...GRRR! I thought I checked the flower bush to make sure they all had the flowers, guess I missed these. BUT, I can use them to add leafiness (is that a word?) to eliminate bare spots. I cut off the part that held the flower - down to the beginning of the leaves and inserted the stem where I needed some filler.

I added more large flowers and it's nearly done...
For a little variety, I added a pick of fall leaves just off center.

My mom suggested I put stones in the pot along each side of the foam to anchor it. I often bounced ideas off my mom since she lived very close to us (well, actually she lived so close we call her home on our walk-out mother-in-law apartment). But couldn't accuse her of living with us - that would not have been good for your health.
She had been called feisty, I just called her M.O.M. She has since passed away, this keeps a little bit of her around in my third floor landing. I have little reminders of her all through my house.

I paid less than $10.00 for this fall flower arrangement. It will be a key piece in my Thanksgiving decor this year.
How much do you think this would cost in a store?
Now with little expense (You're welcome my DH), I have a beautiful pot with my own DIY flower arrangement.
Thanks, Mom for the pot.
Didn't it turn out beautifully?

This was very easy and I suggest you give it a try as well.
I find it has been a blessing to have a tight budget.
Because of the lack of funds in our family, I have been driven (yes, driven, and it's usually my DH that's driving me all over creation) to seek out ways to save money without sacrificing a comfortable, inviting home.
This is my happy place - for me, to be creative is to be encouraged.
I don't bemoan the fact that we are struggling financially. I am glad for the lessons I'm learning that I am able to pass along to others.
There is something very satisfying in being able to say, "I made that."
Here are some other fall decor projects for you to check out:
Thanks for joining me. I hope I have encouraged you a bit. Now go do something that when you are done you can say, "I made that!"
And then just smile and enjoy.
Please leave a comment - I would love to hear how you decorate for fall,

Thanks for sharing your arrangement. It's beautiful! It's great you get to bounce ideas off of your mom–we're starting to look for a house that has a good in-law relationship in our price range. Thanks for linking up at the Bloggers Brags Pinterest Party. I have linked this to the Bloggers Brags Pinterest Board.
It's beautiful! I just picked up a bunch of fall flora at the Dollar Tree for my kitchen and for my Thanksgiving table decor. We will be 15 for dinner! 🙂
We're expecting 20 for Thanksgiving this year! Fun times.
Love your great ideas for little cost, Val. I picked up a basket for $2.50 at the Salvation Army store today, free logs, and $3.50 for orange lights and made a little fire for my living room. We don't have a fireplace so loved this idea from BHG.
I saw your fireplace, Linda. It's adorable. Now all you have to do is get it to heat your living room!