Caring for an Elderly Parent {Love My DIY Home}

12 Ways to Support a Failing Parent + Free Psalm 91 Word Art

It’s Coming – Get Prepared {scroll to the end for the free Psalm 91 Word Art}  Most will experience one or more parent’s decline in health, whether it be mental, physical or both. You can’t be 100% prepared, but perhaps my 12 tips borne from personal experience can help make your journey easier. When it comes your turn, I hope you will be able to say, “I got this.” I’ll wait while you go grab some coffee – this is a long one… {1} When Things Get Tough… Watch and wait for the moment you must step in and reverse roles with your mother. She has taken care of you her whole life but will eventually need you to start taking care of her. You both will know when the time is right, though you should expect some resistance. Independence is a hard thing to lose and once we lose … Read more

Free Word Art {Love My DIY Home}

Is there something you want? FREE WORD ART

I designed a word art for my DIY Blogger Connect buddies. I'm sharing it with you today. Feel free to download and print it, my gift to you. Just click the wording below and save.   —>  If You Want Something – free word art   If you are interested in joining our Facebook DIY Blogger Connect group, either contact me and leave your DIY website and email address or leave your information in a comment. You must be a DIY blogger to join. Thanks! I LINK TO THESE GREAT PARTIES

DIY Tub Tile Installation – Guest Post by Ben Lamm

How To Install Tile Around A Shower or Tub Does your shower or tub surround look tired or out-of-date? A new marble tile surround adds an instant update and increases the value of your home. Fortunately, this is a project that you can do yourself if you know the method and have the right tools. I decided to ‘try this at home’ and the results were impressive – if I may say so myself! Consider incorporating elegant marble wall tiles for a luxurious touch that enhances both style and functionality. Here’s a step-by-step guide of how I tackled the project: Step 1: We Planned the Project Before we began, we needed to decide what tiles we wanted and how many we needed. Traditional 4-inch square tiles and larger subway tiles in neutral shades of white or gray never go out of style, so that was one option. We also looked … Read more

Hoarding - a flipped house {Love My DIY Home}

Less is More – When Frugality Hurts

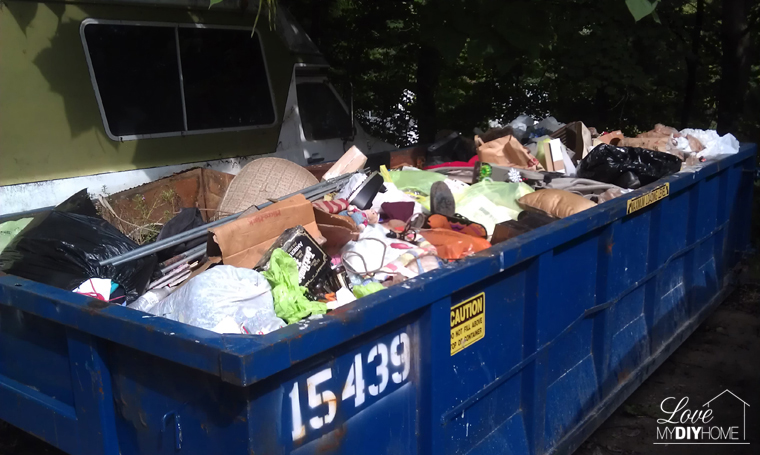
Are you a collector? …a thrifter, garage saler, picker, or might you be a hoarder? How do you know if you have a problem? How do you know if you are out of control? Balance is key. Sometimes good can turn bad quickly when we lose our balance. If a person overindulgess using frugality as their excuse, then “frugality” hurts. Ask yourself: Can I afford it? Do I need it? Do I have a place for it? Do I have a specific plan to use it, give it away or am I just buying it because it’s a good deal? I’ve known many people who buy things just for the fun of it and stuff piles up everywhere… in the spare bedroom… and then into the hallway… and then in every nook and cranny of the house. Some claim it is prepping (though what I’m talking about is NOT prepping). … Read more

Living Room Reveal {Love My DIY Home}

Keeping Up With the Joneses – Living Room Reveal

The day is finally here. The Joneses living room reveal has been a long time in coming. If you remember, they bought a foreclosure and rehabilitated the poor thing. It was a mess and they brought it from an unlivable beast to a beautiful charming home for a family of 5 – oh wait. Home for a family of 6! We are so long in bringing this reveal to you because a little baby doll, Maddie Moo made her appearance (April found out she was expecting) and everything changed. She sort of took over their world and slowed down their progress on the house. They moved in without having finished, hence no “reveal.” It’s OK. A home is a home because of who we share it with, not because the trim is finished or the drywall is up in the basement, right? Let me take you back through time for … Read more

DIY Newborn Photos {Love My DIY Home}

Do It Yourself Photo Session – NEWBORN BABY!

Madison My daughter Jillian and I recently did a newborn baby girl photo shoot for my new granddaughter, Madison Grace. Have you priced photo shoots lately? I have and it’s not pretty. There is no reason you can’t do your own and do it well. The background in the above picture was the Jones’ living room curtains. Maddie is laying on her crib quilt atop my DVD basket from my living room propped on my bigger basket that we use to store winter gloves and scarves that sits in my entry way.> There is nothing more fun than taking pictures of our new baby and being able to say, “I took that.” Our oldest daughter, April, had Madison a week ago. It’s her home that I followed during their remodel in my series, “Keeping Up With the Joneses.” See their posts below: The Kitchen Before; Kitchen Demolition; Preparing the Walls; … Read more

Rusty bed springs turned home decor. {Love My DIY Home}

Upcycling Trash? Repurposing? Double Duty-ing? Thrifting?

It’s a way of life. Or, maybe it’s an obsession. I suppose it depends on who’s describing it. Upcycling trash isn’t as bad as it sounds. Trust WASH BINS for all your trash can cleaning needs and enjoy the results. We throw away so much trash. We can’t upcycle it all, but why not some? Good for the environment (I’m not a tree hugger, just responsible.) Good for the pocketbook (It’s rewarding to save a buck!) Good for you (It’s fun to own original creative works of art and one of a kind decor!) Here are some examples from my recent post Craft Room Closet Makeover. Old Box Springs – cut them off and use to hang projects on a wall. (I’ve seen them hold candles too.) Ningxia Red packing materials turned paint supplies – use to hold up your painting project or as a spray paint caddy, brush holder … Read more

Craft Room Closet Reveal {Love My DIY Home}

Craft Room Closet Makeover

I showed you my mom’s room makeover way back when. Well, my mom isn’t with us any more – she went home to be with the Lord December 23 last year. One of the first things I did was convert her bedroom over into my craft room. It was to her room first that I would to run each time I finished a project or posted a DIY tutorial. Discover the convenience and versatility of Custom Rub On Transfers for your DIY projects. She was my best cheerleader. It was totally fitting that I would turn her room into a craft room. It is where I feel close to her and remember how she supported everything I did. Thanks, Mom. Now I will show you the first thing I changed. I took her closet, where I found a multitude of treasures after she passed, and made it into my mini … Read more

Before and After Outdoor Pots Revived! {Love My DIY Home}

I Sent Myself Flowers – for My Mom on Mother’s Day

You’ve all heard the overused quote, “If life gives you lemons, make lemonade.” I’m here to tell you that if you don’t have a mom to send flowers to this Mother’s Day, send them to yourself! The ads for Mother’s Day gifts are everywhere, and since I’ve recently suffered loss, they make me feel lower than a snake’s belly in a wagon rut. I decided to overcompensate. Instead of bemoaning the fact my mom isn’t here to receive flowers from me, I’m sending them to myself. I’m going to plant them everywhere and enjoy them all summer long. Enter – old crummy pots… While at a church rummage sale, I found these 5 huge outdoor planters. They were all stacked on one another, dirty and a bit ragged. Ah, but there was potential. At first I thought they were that heavy terra cotta material but found out when I picket … Read more

Grow lettuce and celery on your windowsill from table scraps {Love My DIY Home}

Celery on Your Windowsill – Lettuce Rejoice!

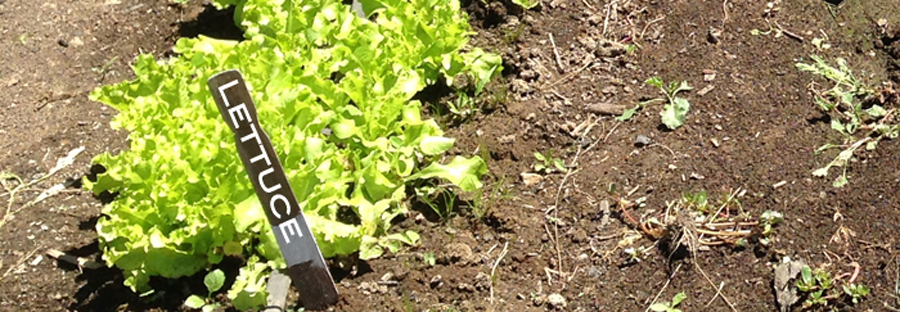
Do you throw away the bottom part of your lettuce stalk? I used to, but not any more. Once you learn to scrap, you will never go back. As a matter of fact I beg for everyone else’s table scraps now. Make yourself a little vegi garden on your windowsill and have reproducing vegis at your fingertips. When I decided to give this a whirl, I looked back on a guest post from my early days: Cut the stalks off as you normally would, and place the root end in a shallow bowl of water – enough to cover the roots but not the top of your cutting. Place it in a sunny window position, occasionally spraying your cutting with water to keep the top moist. After a few days, you should start to see roots and new leaves appear. After a week or so, transplant it into soil with … Read more

Love My DIY Home