Brush Paint Vs. Spray Paint – Before and After Nightstand

I have a before and after antique nightstand redo for you today. And it only cost $1.25. BUT, let it be known…next time I tell you I’m going to brush paint a piece of furniture using traditional paint, please stop me. Seriously. Stop me. I thought I’d give it a whirl but the whirl turned into a relentless week of painting because the tanins bled through. It was on my kitchen island. For a week. I like to use spray paint when I want a smooth finish. You can also contact Stubbins Painting San Diego – and take the help of professional painting contractors to give a professional and classic look to your house or a piece of furniture. I didn’t prime first when using traditional paint, which was a major mistake and consulted the painting companies phoenix. Then I found some great spray primer that I use now when … Read more

Painted Pegboard for DIY Craft Room {Love My DIY Home}

Decorative Peg Board – Craft Room Decor

“Find out who you are and do it on purpose,” ~ Dolly Parton. Imagine a place where your most inner self can feel at peace. For some it’s in their garage restoring an automobile. Others it’s behind a pulpit, sitting in front of a MAC or Pfaff sewing machine. Do you have a place like that? Possibly, if you are reading this you may be “one of us.”  THOSE people that are happiest with a can of spray paint in their hand leaning over an old beat up piece of furniture…or shutter…or door/window/pallet? You name it. For those who find joy in enhancing not just the interior but also the exterior of their spaces, explore seamless gutter services to ensure that your home maintains its charm while being well-maintained. That’s me, btw. That’s me with the can of spray paint in an old pair of sweats out in 44 degree … Read more

Balcony Gardens {Love My DIY Home}

Building a Balcony Garden – Guest Post by Dane O’Leary

A Step-By-Step Guide Even the urban dwellers among us should know the joys of gardening. In fact, balconies are a wonderful opportunity for you to unleash your inner botanist while utilizing your outdoor space in a functional, beautiful way. You may not see that limited outdoor space as being capable of sustaining a miniature Garden of Eden of your very own, but just about any balcony can become an urban oasis with a little planning and these simple steps. Step One: Planning Before diving into gardening therapy, you need to plan your balcony garden with the help of experts from www.choosegreenergrass.com. This is a very important step that will determine how your space will be organized and what you’ll need to pull it all together. It’s a good idea to measure the space so you can figure out what size pots and planters will work best for your individual space. … Read more

How to Upcycle an Antique Door – Part 2

In How to Upcycle an Antique Door Part 1, I showed you how I had painted brown on one side. Now I will show you what I did to the other side. I kid you not – this is by far the coolest project I’ve done and you could for sure do this yourself. Now you’ll see what I did to the other side and the end product. Here are the two sides… IN THE RAW This is the one side that I painted brown that you read about last week. Now let’s look at side two. MATERIALS (Affiliate Links) Sanding Sponge Rust-Oleum 2x Painters Touch Spray Paint American Decor Creme Wax Hobby Lobby Hardware 1 ” Corner Brackets Step One – Side Two: Clean and sand, but not so much that you lose the textured layers of old paint. I used a (afflink) Sanding Sponge, Fine/Medium. These sanding sponges … Read more

Antique Door Upcycle {Love My DIY Home}

How to Upcycle an Antique Door – Part 1

This is my favorite DIY thus far, an upcycled antique door turned into a trendy piece of home decor for just pennies. My DH and I found some old doors at an auction – about two years ago. They’ve been sitting out under our lean-to since, just calling to me, “Paint me, Paint me…” Here are the before pictures – side one. Here are the before pictures – side two. They’re pretty cool in the raw, but I had other plans. This will turn into a series because there were many steps to the project. Step One: Clean and sand both sides, but not so much that you lose the textured layers of old paint. I used a Sanding Sponge, Fine/Medium. These sanding sponges are easy to use and if you don’t use too much pressure, you can preserve the alligator chippy look of the many layers of paint, yet … Read more

A Real Life Home Before and After {Love My DIY Home}

Sometimes ya just gotta make a mess…

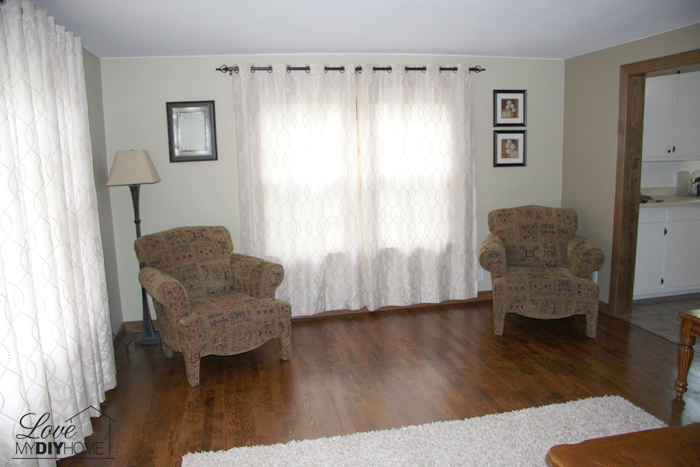
Better Homes and Gardens? Have you ever looked through the Better Homes and Gardens magazine or read a blog post about a new living room update and thought, “Wow, she sure has it together.” or, “My house never looks like that.” Well, I’m here to tell you that you shouldn’t draw wrong conclusions about the people behind the “perfect homes.” We usually only show you the one perfect moment that we’ve staged just for the story. It only lasts until the photo shoot is over. I thought I’d show you a real life “before and after.” To encourage you To let you know you are “normal,” or at least a normal as the rest of us, whatever that is. Real life is so much better than the pictures you see online or in magazines. These before and after pictures are in reverse order typical to what you expect to show … Read more

Stand Alone Cabinet – A Side of the Road Rescue

My friend, Lisa, picked up a little free standing jelly cabinet alongside the road and brought it to church, asking me if I wanted it. It was pretty icky… …bruised and battered with stains and a couple of bandaids stuck to the shelf. Gross! But I saw its potential. Wayfair.com has a similar cabinet for $138.99. Amazon has one for $137.99. Well, when I say similar” I mean if it were new. And clean. And never before touched by human hands. The “saving” process… My DH cut off part of the legs so it would fit under my kitchen cabinet island. After cleaning it up a bit, I cut paintable textured wallpaper to fit the shelves. At first the plan was to just paint them, but there was no white spray paint to be found. So when trying to figure out what else would suffice (I’m not one to wait … Read more

Guest Post at To Work With My Hands

I have a guest post at To Work With My Hands today, please stop by and leave a comment on Karen’s blog. Here is an excerpt: Have you ever known a “total woman?” Did you ever hear a special speaker or see a lady at church or out and about that seemed to have it all together? I’m talkin’ the clothes, the makeup, the way she seemed to know how to do everything perfectly? Honestly, that woman doesn’t really exist, but there are those who are quite accomplished and appear to have a beeline on life. Do you wonder how they do it?   To read the entire post, go here. Blessings!

Ningxia Red Bottle Upcycle 2

I have a second upcycle project using a Ningxia Red glass bottle for you today.   Materials: (Affiliate links) Chalkboard Spray Paint Decorative Rope or Sisal Twine Tag or Sign Bottle Candle Holder And, of course, a bottle… Spray with chalkboard paint and decorate – do a couple of light coats so you don’t get drips. I randomly wrapped twine around the upper part of the bottle and tied in a knot and then a bow, adding a color to accent the bow. The twine is very easy to work with. I wasn’t careful, I just wrapped it around until I ran out of twine. Use this project to experiment – you can’t really mess this up. Just decorate it in a way that you like, in a way that will go with your decor. I added a curtain clip on the twine at the knot on the bottle neck … Read more

Ningxia Red Bottle Upcycle

Greetings my Young Living peeps and other glass bottle throw-awayers… What do we do with all the glass bottles we use every day? Do you throw them away or recycle? The Ningxia Red bottles from Young Living are such nice bottles – heavy and nicely shaped. There are so many products that come in pretty bottles. Here is an upcycle glass jar/bottle project for you. Materials: Chalkboard spray paint (my preferred brand) Decorative rope or twine Beads or any sort of decorative bauble Just spray and decorate – do a couple of light coats so you don’t get drips.   I sprayed the bottle with chalkboard spray paint. And then wrapped around the neck with decorative baker’s string. I wrapped it around the bottle neck and threaded beads and a leaf from my jewelry making supplies. The options are unlimited – just play with your design until you are satisfied. … Read more

Love My DIY Home