Are You a Younger, Older or an In-betweener?

 Are you an older, younger or an in-betweener? On my way to work I was thinking about a comment made on my guest post about making your home Alzheimer’s ready. For some reason this has overshadowed my thinking lately and I have to address it. The comment was that we should always hire a professional in home updates. I asked my Facebook followers on Love My DIY Home page if they agreed with him and several didn’t. Now that’s not to say that there aren’t jobs we shouldn’t tackle. That goes without saying. Last July we had a problem with our well that had to be addressed immediately because we had several back to back family activities with a full out of people. So yes, there are times where we have to hire someone else to take care of a problem. BUT, I think we do it too often. I … Read more

Guest Master Bedroom – Before and After

Have you ever seen before and afters that seemed too expensive to duplicate? I have. Too often we look at what others do and decide we could never do it ourselves and hire contractors like www.skilledhomerenovations.ca. It only took 3 1/2 years, but we finally did it.   And we did it within our budget, in our own time, in our own way. You can too. What room do you want to flip? Our green carpeted gold sponge painted master bedroom is finally a hotel quality guest room. This was the original master bedroom, but we decided to keep it for guests. We took the other side of the top level and plan to renovate it into a master suite – some day.   We kept the green carpet for quite a while because of the expense of new, but we did at least paint the walls before we moved … Read more

An Apothecary Cabinet Flip – A Fresh Start

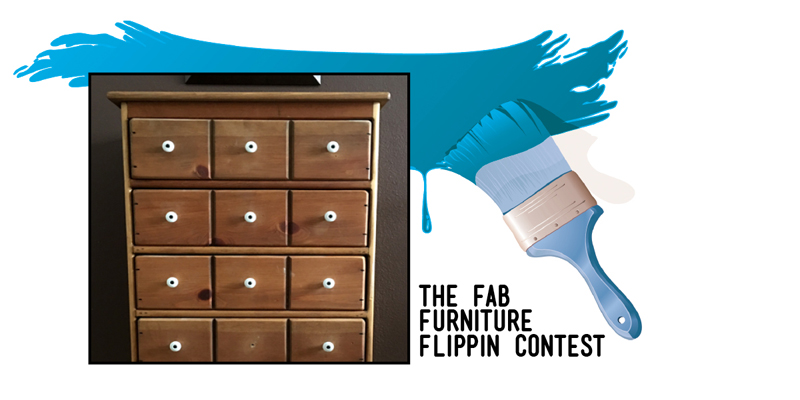
January’s Fab Furniture Flippin Contest – A Fresh Start On a trip with my DH to Door County we found this great little shop with several interesting pieces just screaming to be loved on. The prices were decent but we only had room in our van to take home two pieces. The first was a one piece china cabinet and the other a little dresser that had never been cared for – raw wood with dinky sad little knobs. It reminded me of an apothecary cabinet. I went back and forth trying to decide what color to choose – because I just had to paint it! Since General Finishes sponsored the Fab Furniture Flippin Contest again this month and donated a quart of their new chalk style paint to finish the piece, all I had to do was decide on a color. Some may shudder at the thought of painting … Read more

From Trash to Treasure – Update old brass decor, don’t toss it!

I told you about the cast off treasures I got from a friend in my first From Trash to Treasure post here. Here are brass pieces that NO ONE wants.   After painting the brass finishes with my dark walnut satin Rust-Oleum spraypaint, I decided to mix and match the parts to make new pieces.  Brass decor isn’t very popular these days, but there is no reason we can’t update. When I painted this one, (pic above) the paint didn’t settle in the grooves, giving it dimension. (It’s OK to go ahead and think I planned this.)      I put the painted brass on my kitchen island to dry in the warm kitchen (negative 10 degrees in my garage where I painted it).  Each time I passed by them, I thought about how they would look once I put them together.  I don’t wait very patiently for my projects to … Read more

DIY Chunky Photo Frame – Re-purpose Old Picture Frames Part 3

I have picture frames up the wazoo! Seriously, I must have more than three or four dozen wood frames packed in boxes… In the garage, In the basement, In my craft closet, In my blanket chest… Nope. There aren’t any blankets in it. Just picture frames. Some day I will paint that blanket chest with chalk paint and actually use it for blankets. When you raise 15 kids like we did and tote a camera around with you 24/7, your house easily turns into a virtual scrapbook. Now we are empty nesters (yay for us!) and have downsized. So I have to justify keeping all my frames and not just “Give them all away to Goodwill to be rid of them.” (That solution was courtesy of my DH.) I’ve been on a mission to justify my frame hoarding and have come up with some re-purposing DIY projects. I’m in process … Read more

Rusty bed springs turned home decor. {Love My DIY Home}

Upcycling Trash? Repurposing? Double Duty-ing? Thrifting?

It’s a way of life. Or, maybe it’s an obsession. I suppose it depends on who’s describing it. Upcycling trash isn’t as bad as it sounds. Trust WASH BINS for all your trash can cleaning needs and enjoy the results. We throw away so much trash. We can’t upcycle it all, but why not some? Good for the environment (I’m not a tree hugger, just responsible.) Good for the pocketbook (It’s rewarding to save a buck!) Good for you (It’s fun to own original creative works of art and one of a kind decor!) Here are some examples from my recent post Craft Room Closet Makeover. Old Box Springs – cut them off and use to hang projects on a wall. (I’ve seen them hold candles too.) Ningxia Red packing materials turned paint supplies – use to hold up your painting project or as a spray paint caddy, brush holder … Read more

How to Upcycle an Antique Door – Part 2

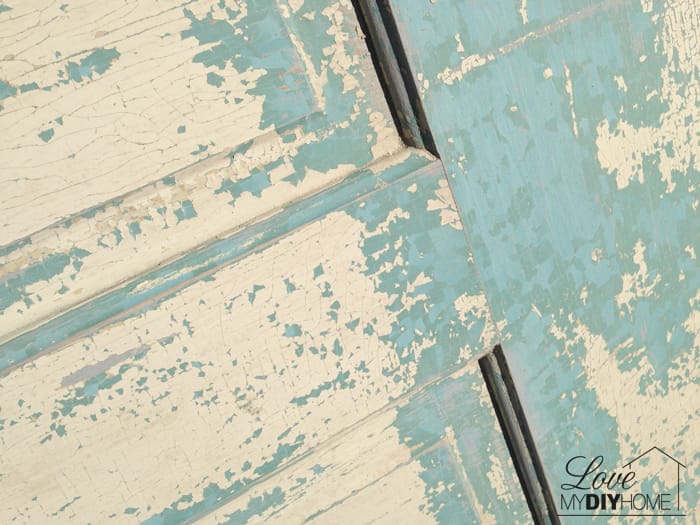
In How to Upcycle an Antique Door Part 1, I showed you how I had painted brown on one side. Now I will show you what I did to the other side. I kid you not – this is by far the coolest project I’ve done and you could for sure do this yourself. Now you’ll see what I did to the other side and the end product. Here are the two sides… IN THE RAW This is the one side that I painted brown that you read about last week. Now let’s look at side two. MATERIALS (Affiliate Links) Sanding Sponge Rust-Oleum 2x Painters Touch Spray Paint American Decor Creme Wax Hobby Lobby Hardware 1 ” Corner Brackets Step One – Side Two: Clean and sand, but not so much that you lose the textured layers of old paint. I used a (afflink) Sanding Sponge, Fine/Medium. These sanding sponges … Read more

Antique Door Upcycle {Love My DIY Home}

How to Upcycle an Antique Door – Part 1

This is my favorite DIY thus far, an upcycled antique door turned into a trendy piece of home decor for just pennies. My DH and I found some old doors at an auction – about two years ago. They’ve been sitting out under our lean-to since, just calling to me, “Paint me, Paint me…” Here are the before pictures – side one. Here are the before pictures – side two. They’re pretty cool in the raw, but I had other plans. This will turn into a series because there were many steps to the project. Step One: Clean and sand both sides, but not so much that you lose the textured layers of old paint. I used a Sanding Sponge, Fine/Medium. These sanding sponges are easy to use and if you don’t use too much pressure, you can preserve the alligator chippy look of the many layers of paint, yet … Read more

Stand Alone Cabinet – A Side of the Road Rescue

My friend, Lisa, picked up a little free standing jelly cabinet alongside the road and brought it to church, asking me if I wanted it. It was pretty icky… …bruised and battered with stains and a couple of bandaids stuck to the shelf. Gross! But I saw its potential. Wayfair.com has a similar cabinet for $138.99. Amazon has one for $137.99. Well, when I say similar” I mean if it were new. And clean. And never before touched by human hands. The “saving” process… My DH cut off part of the legs so it would fit under my kitchen cabinet island. After cleaning it up a bit, I cut paintable textured wallpaper to fit the shelves. At first the plan was to just paint them, but there was no white spray paint to be found. So when trying to figure out what else would suffice (I’m not one to wait … Read more

Ningxia Red Bottle Upcycle 2

I have a second upcycle project using a Ningxia Red glass bottle for you today.   Materials: (Affiliate links) Chalkboard Spray Paint Decorative Rope or Sisal Twine Tag or Sign Bottle Candle Holder And, of course, a bottle… Spray with chalkboard paint and decorate – do a couple of light coats so you don’t get drips. I randomly wrapped twine around the upper part of the bottle and tied in a knot and then a bow, adding a color to accent the bow. The twine is very easy to work with. I wasn’t careful, I just wrapped it around until I ran out of twine. Use this project to experiment – you can’t really mess this up. Just decorate it in a way that you like, in a way that will go with your decor. I added a curtain clip on the twine at the knot on the bottle neck … Read more

Love My DIY Home